
Is your RV exterior looking worn, with a dull or yellow finish and cracked and faded decals?
There’s no reason to live with an RV exterior that drags down the look and value of your camper. Many RV owners DIY a new paint job or replace decals to update their motorhome, fifth-wheel, or travel trailer and save thousands versus a professional restoration.
To learn the best ways to refinish a worn RV exterior, I put all the details in this guide, including the average cost and most popular materials for restoration.
With the right plan, your recreational vehicle can look shiny and new again, so check out the options below!
Reasons to RePaint an RV Exterior
The exterior of any recreational vehicle takes a continual beating from the weather, harsh UV rays, and dust and road grime as you travel to new camping destinations and while you store it during the winter months.
While the siding of RVs is extremely durable, it doesn’t take but a few years to see signs of aging and wear if you don’t keep up with a regular waxing and maintenance routine.
When the siding is too far worn to fix with a high-quality wax or sealant, the best solution is to repaint the surface.
Why repaint?
The cost to replace fiberglass, or aluminum sheeting can run upwards of $15,000, and it will take a professional installer to have the panels lie flush and seal tightly against the elements.
Many RV owners find their camper isn’t worth this expense, they are only looking for a reasonable investment so they can keep enjoying their road trips.
RV Painting Cost
Hiring an autobody paint expert to refinish your camper is another option, but again, the cost will run anywhere from $5,000-$12,000 for prep, primer, paint, and sealant.
For RVers on a budget, the best way to make your camper look presentable is to DIY an RV paint job.
While repainting your camper may seem daunting, the reality is that it isn’t that difficult of a project and the results will come out better than you expect.
I painted my Class C motorhome a decade ago, and I’ve only had to do some minor touchups over the years. I spent $1,200 on my project for all supplies, and I know of many other RV owners who have spent much less, so you can save a lot of money revamping your camper yourself.
The best part is that you have complete creative control over color and design, so you can customize your RV and make it even more special.
Remember that RV parks can turn away recreational vehicles that look old or unkempt, so keeping the exterior of your RV looking as good as possible by giving it a new paint job can go a long way in reducing RVing stress.
How To Repaint an RV Exterior
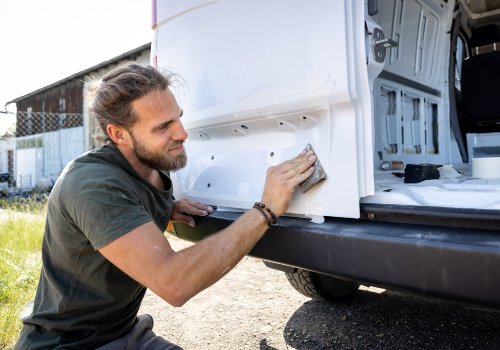
Most RV exteriors are made of fiberglass or aluminum. Both materials can be painted over, but you’ll need to prep the siding differently so the paint will adhere properly.
Before you begin with painting, the first step is dealing with ensuring the surface is smooth and free of stickers and debris.
RV Decal Removal
The bane of all RV DIY paint jobs is the decals. Some campers are covered in swoops and swirls, while others have straight bands running the full length of the trailer. Many motorhome cabs have decals that match those on the box of the camper.
Deciding if and when to remove the decals is up to you and how bad they look.
If the decals are in good shape, I suggest you carefully tape them off and just paint around them. This is the fastest way to complete the painting without wasting hours on decal removal and reapplication.
If the decals are slightly faded or cracking, you may still be able to save them. Buy a small can of an automotive clear coat and paint or spray over a test section of the decal.
In many cases, the clear coat will absorb into cracks of the decal and deepen any faded color, making the vinyl look almost new again.
If this happens for you, you can tape off the decals, repaint, and then apply the clear coat over the entire surface bringing your decals back to life and leaving the rest of your RV with a glossy sheen.
If the decals are partially missing or are too far gone to save, you should remove them.
I want to give a fair warning that removing decals, especially from older RVs, will be very time-consuming.
I spent days testing various methods, from heat guns and scrapers to sandpaper and decal removal wheels and for me, the Decal Eraser Wheel was the least stressful of the options.
A removal wheel takes practice to get it right, and you must work in a deliberate manner for best results.
If your RV has very old decals, sandpaper may be enough to smooth out any rough edges, so you don’t see them when you paint the RV exterior.
Prep Rest of RV Exterior
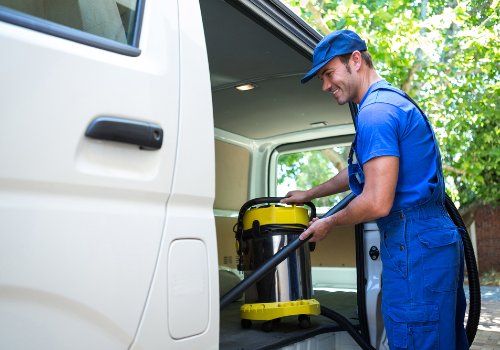
After dealing with any decal removal, now you’ll need to give your RV exterior a deep cleaning to remove grease, grime, dirt, dust, and other contaminants that can prevent your paint products from adhering.
If you have an indoor location to clean and paint your RV, it will help reduce issues with contaminants and weather interfering with the job. If you must work outdoors, don’t worry, most paint dries in a matter of hours which gives you plenty of time to work around weather conditions.
I suggest gently power-washing your RV using a degreasing cleanser, and using a brush to get into any edges, trims, or cracks so all the dirt is gone.
Don’t forget to wash the roof well, as any dirt will run over the siding if it rains and possibly ruin your paint job.
If your camper has any sheen on the surface, lightly sand the siding until it’s gone, and then use a tack cloth to remove any dusty residue.
The last you want to do to prepare your RV for a new paint job is to recaulk any gaps around window and door frames and along the edges of trim work.
Use a paintable caulk to keep the final look clean. Silicone caulk is more durable, but paint repels from the surface and will peel off once it dries.
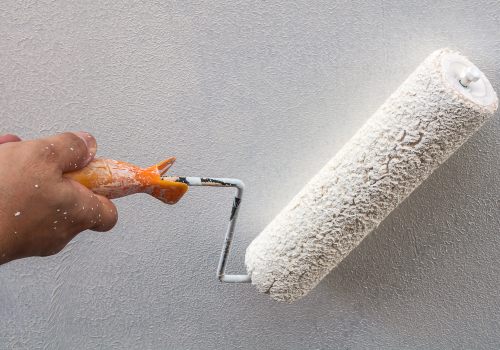
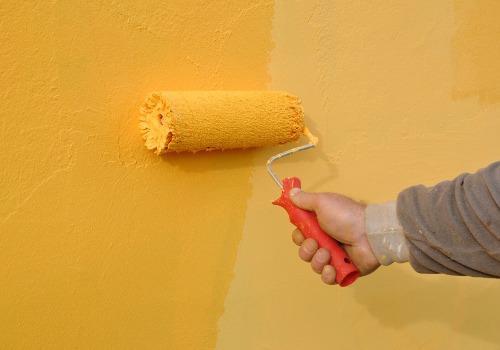
Decide on Paint Application Method
I have seen DIY RV repainting done with paint rollers and with paint sprayers.
Both methods have a very similar look when finished, so which one you choose is a matter of personal taste and how much confidence you have using the tools.
A roller and tray is the least expensive option, and it gives you much more control over the paint application. I chose to roll and brush on my new RV exterior paint, and didn’t feel the need to have to tape off windows which saves a lot of time.
Rolling on the paint gave me time to watch for and catch any drips so the final look was nice and smooth. In any places where I wanted a clean edge, such as the transition between different colors, I ran painter’s tape.
On the downside, it takes physically longer to cover the entire surface of your camper using a roller, and the thickness of the paint isn’t as uniform so it takes longer for each coat to dry.
If you know your way around a paint sprayer, you may find using it much faster to repaint an RV exterior, especially if the siding isn’t flat.
You’ll need to spend several hours in prep time taping off windows, trims, and other features you don’t want overspray to get onto, but once done, the painting goes quickly.
The paint dries faster using a paint sprayer as the coats are thinner. This allows you to put on all the layers in less time, so you can complete the job with less worry the weather will become an issue.
On the downside, overspray is a real issue with using a paint sprayer, which means you need to avoid hitting other objects nearby. Another problem with some paint sprayers is clogging, which can lead to sputtering or uneven paint application.
What Paint Should I Use to Paint an RV?
Many people think you need to use expensive automotive-grade paint to refinish an RV, but the truth is that you can use quality exterior house paint and save a bundle.
You do need to buy paint that is compatible with the surface of either the fiberglass or aluminum RV siding. One way to ensure good adhesion is to use a bonding primer before applying your first color coat.
Insl-X Stix Bonding Primer is an excellent choice that will make your subsequent coats look better.
Want to Connect With a Community of Over 1,078 RV Enthusiasts?
You’ll need to also set aside some money for a clear protective coat that will maintain the look of your paint job. I suggest two layers of MasterClear Supreme ultimate clear coat by Modern Masters.
Expect to apply three to five layers over your RV. One is the primer coat, followed by two coats of exterior paint in the colors of your choice, and one to two coats of a clear protective finish.
Since each RV size is different, you’ll need to measure the surface area to know how many gallons to buy. For a general idea, I have a 24-foot Class C and I bought 2 gallons each of primer and clear coat and used three gallons of paint to finish my camper with extra to spare.
I do want to mention that some RVers use spray paint to refinish smaller campers. If you have good hand control, spray paint enamels leave a highly durable finish that can look much more “professional” versus rolling on paint.
Finishing the RV Exterior After Paint
Now that you have your new paint on your RV, it’s time to add any new decals or decorations to your camper siding and clean up or replace trim work or other features.
You can purchase new RV decal kits online to replace ones you had to remove. You can also shop Etsy for custom vinyl decals that will add personality to your camper.
After you have the graphics set over your new paint job, now you should take a step back and look at all the trim, weatherstripping, vent covers, access doors, and hardware on the rest of your RV that may bring the overall look down.
Stained insert trim, rusty chrome or hardware, and discolored vent covers or doors are easy to fix and worth the extra couple of hours of work.
RV replacement insert molding is a thin material that slips into the metal trim that goes all around the tops and edges of the camper that hold the siding in place.
The molding covers the screws, and for around $20 you can buy a roll long enough (comes in both black and white) to refresh your entire camper’s trim.
If you didn’t repaint any vent covers or access doors, you can find replacements for most camper models through various dealers online.
Polish or replace any worn or rusty hardware to complete the RV exterior refinish.
Protect Your New RV Paint Job
The key to keeping your new paint in excellent shape is to take care of your RV exterior on a regular schedule.
Waxing the surface every three to six months will help keep up a weather-resistant barrier that will stop the paint from wanting to bubble or peel.
Waxing also keeps the paint color clear and vibrant. Look for a product that offers the best UV protection to stop fading.
Wash your RV after each road trip by hand, being careful not to use any abrasive brushes or cleaners that could scratch your new paint. Avoid using a power washer, which will force moisture into any cracks and possibly underneath the paint.
Inspect your clear coat every few months. Depending on where and how often you camp, you may see the finish dulling after a year or two.
It’s smart to wash the RV and recoat the protective finish as soon as you see it fading. Wax can only work to provide a certain layer of protection, it’s the clear coat that will add to the longevity of your DIY RV paint restoration.
Final Thoughts
If you have an RV that looks a bit ragged on the outside, don’t be afraid to make it look new again with a DIY paint job.
You can save thousands of dollars versus a professional RV paint restoration, and get to spend that money on fun family pursuits instead.
Will it take work to redo your RV exterior yourself? Yes. But, the effort will be worth it with a customized finish that will make every camping trip much more memorable!
Revealing DIY RV New Paint Job (Video)
"Man cannot discover new oceans unless he has the courage to lose sight of the shore."
-- Andre Gide


