
Published on
May 4th, 2021
Updated on February 8th, 2024
Table of Contents
show
1. Automotive Section
| Caulking: As you inspect everything inside, always be aware of loose or open gaps in caulking. Have clear silicone caulk with you to reseal bad spots. |
| (Motorhome) Rubber Components: Belts, Gaskets, and others aren’t dried out, no stripping; Rubber is still pliable |
| (Motorhome) Automotive Fuses: None of the fuses are missing, no burning, melting, or broken |
| (Motorhome) Rubber Components: Belts, Gaskets, and others aren’t dried out, no stripping; rubber is still pliable |
| (Motorhome) Fluids & Filters: Correct color, Right level, Not past change period |
| Engine Oil (Yellow/Light Brown) |
| Transmission Fluid (Pink/Red) |
| Power Steering Fluid (Clear/ Red) |
| Brake Fluid (Yellow/Brown) |
| Radiator Coolant (Green/Orange/Pink) |
| Windshield Washer Fluid (Blue/Green/Orange) |
| (Motorhome) Generator Spark Plug: Use a Multimeter to check efficiency. Check spacing |
| (Motorhome) Air Filter: Flex the filter. The interior of the fins is clean and within the replacement period. |
| (Motorhome) Generator Oil: Yellow/Light Brown, Right level, Not past change period |
| (Motorhome) Generator Condition: visually inspect the generator for excessive wear of parts and missing insulation |
| (Motorhome) Generator Condition: visually inspect generator for excessive wear of parts and missing insulation |
| (Motorhome) Start the Engine: Notate hesitation and odd sounds. Run for a few minutes. Open Hood to listen directly. Then shut off |
| (Motorhome) Start the Generator: Notate hesitation and weird sounds. Run for a few minutes. Open the bay and cover to listen directly. Then shut off |
| Tires: Test the air pressure. Check for soft spots in the rubber, sharp objects in the treads, and measure tread thickness. |
| Rims: Not bent around the edges. Lugnuts are tight. |
| Ball Bearings: Pop-ups need the ball bearings to be regreased annually. There should be a tube to insert new grease. Other towables may have this feature too. |
| Brakes: The pads aren’t too worn down. Pad wear is even among all the wheels. Rotors or drums function well. |
| Towable Suspension: Springs and shocks are in good working order |
| (Motorhome) Air Suspension: Air suspension works. Air pump turns on/off as needed. Manual controls work. |
| Axles: Axles are in good working order and don’t look bowed due to excessive weight |
| Underbelly: Corrugated material isn’t ripped or has open spaces. If you don’t have a sealed undercarriage, nothing looks damaged from the road or pests. |
| Department of Transportation (DOT) Lighting: |
| Headlights: turn on, are clear, bulbs light up |
| Front Turn Signals: turn on, are clear, bulbs light up |
| Rear Turn Signals: turn on, are clear, bulbs light up |
| Rear Tail Lights: turn on, are clear, bulbs light up |
| Brake Lights: turn on, are clear, bulbs light up |
| Hazard Lights: turn on, are clear, bulbs light up |
| Clearance Lights: turn on, are clear, bulbs light up, not broken, all lights are in place. |
| Reflectors: None of the reflectors are missing or broken. |
| Fuel Tank Hatch: Lock works, fuel cap unscrews |
| (Motorhome) Windshield Wipers: Both wipers function; the rubber is pliable and creates a good seal on the glass, the variable speed function works, and the fluid dispensers work |
| (Motorhome) Dashboard Panel: All gauges work properly |
| (Motorhome) Dashboard Controls: All controls work properly |
| (Motorhome) Dashboard HVAC: Heater and A/C perform well. Vents open, close, and move well. |
| (Motorhome) Dashboard Media: The multimedia system connects to all of your favorite apps, GPS, and other apps. All speakers work |
| (Motorhome) Pilot Seats: Both seats fully function, are secured, and aren’t peeling. |
| (Motorhome) Side Mirrors: Both mirrors are in place, are adjustable, not cracked, and the heating element works (if applicable) |
| (Motorhome) Pilot Seats: Both seats fully function, are secured and aren’t peeling. |
2. Exterior and Utilities
Want to Connect With a Community of Over 1,078 RV Enthusiasts?
Sign up now and get access to our best content, absolutely free!
(Start furnace test – See RV Troop Preventive Maintenance article for details.)
| Caulking: As you inspect everything inside, always be aware of loose or open gaps in caulking. Have clear silicone caulk with you to reseal bad spots. |
| Hitch Components |
| Ball Receiver/Kingpin: The receiver/Kingpin isn’t dented or has any obstructions preventing a secure connection |
| Safety Chains: All chains are accounted for and in good working order. |
| Anti-Sway Equipment: All pieces are accounted for and function properly. Electronic equipment power up and work according to spec. |
| Tongue Jack: Manual jack crank functions well. The electronic version works correctly. You have the wheel or footplate. |
| House Batteries: Use a multimeter to check the power levels of your 6v or 12v batteries. Disconnect the batteries to clean off any green corrosion on the connection points. For lead acid, make sure the water level is full. [NOTES: Red is positive; black is negative] |
| Power Stabilizer Jacks: The power jacks function through all controls. The calibration of the auto-level is accurate. The jacks are secure in place. Fluid hoses aren’t leaking fluid. |
| Umbilical Cord: The electronic cord fits nicely into the RV and the tow vehicle. If an adapter is needed, you have it or know which one to get. All DOT lights and RV brakes respond well. [NOTES: Use a carpenter’s level to check the calibration. If you have a mobile device app, set the jacks with the app and the cockpit controls.] |
| (if applicable) Battery Box: The battery housing isn’t cracked and stays in place. The cover secures well with the house battery inside. |
| House Batteries: Use a multimeter to check the power levels of your 6v or 12v batteries. Disconnect the batteries to clean off any green corrosion on the connection points. For lead-acid, make sure the water level is full. [NOTES: Red is positive; black is negative] |
| Coach AC and DC Fuses: All fuses are in place, no burning, melting, no broken. |
| Electric Converter: Check the converter’s connections for any loose wires. Make sure the fuse is in good shape. The fan does make a slight noise. If it’s noisier than usual, there could be something wrong with the fan. It’s okay if it’s warm to the touch. |
| Electric Inverter: Look for loose wiring or other irregularities. It’s okay if it’s warm to the touch. The cooling fan will make a slight sound. If there is a fuse, make sure it’s in good repair. |
| Coach Exterior Outlets: Test all of the 110v outlets with an electric outlet tester. There may be some in the exterior bays. |
| Coach Exterior Lights (Non-DOT): Check all lights by turning them on/off. Replace cracked or broken covers. If bulbs are burnt out, all bulbs now have LED substitutes. |
| Shore Power Cord: Inspect the shore power cord and connection. Make sure the cord’s weather shielding doesn’t have open spots. Replace if the prongs or plastic has evidence of burning |
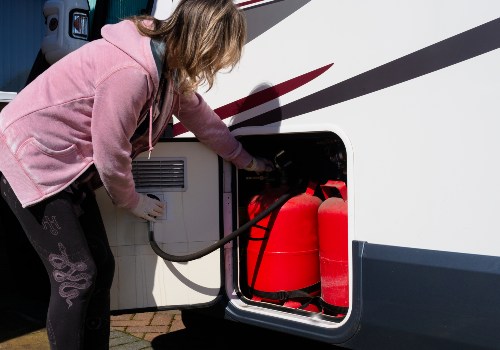
| Propane Mounts: The mount is secure on the front hitch. It holds the bottles well and doesn’t rock excessively. |
| Propane Bottles: The propane bottles don’t leak, and you’ve owned them for less than a year. At the beginning of the season, you may want to exchange them for full bottles that have been inspected. |
| (Motorhome) Permanent Propane Tank: Inspect the tank for leaks, loose connections, and other issues. Perform the soap bubble test to check for leaks. |
| (Motorhome) Propane Gauge: Test the propane gauge by adding propane at an authorized propane service station [NOTES: See our RV Troop Preventive Maintenance article for the soap bubble test details.] |
| Propane Lines: Check your propane lines for leaks. Use the soap bubble test on connection areas. |
| Rear Receiver: The receiver on the RV is in good shape. Any equipment you use with it fits in well, and all parts are accounted for |
| Exterior Bays: Look for cracking seals, bad hinges, loose handles, broken locks, loose insulation, evidence of pests, burnt-out lighting, water damage, or failing floor supports. Make sure pass-through trays roll well both ways. |
| Furnace: If you started the furnace test at the beginning of this section, the temperature inside the coach should be hot. You should have heard the furnace working. Turn it off and start the Air Conditioning Test. |
| Utility Bay: Look for pest evidence. Connect to all shore utilities and look for leaks while you’re de-winterizing |
| Windshield and Windows: Look for cracks, spider cracks, loose weather stripping, rubber seals that haven’t shrunk, you don’t feel air seeping through, ripped screens, damage to exterior window awnings, or other issues. Windows don’t stick. |
| Fresh Water Tank: Empty the anti-freeze or old water from your fresh water tank and refill it with at least a ¼ tank. Fill and rinse once or twice to get the residual anti-freeze out. |
| Water Heater: Empty the anti-freeze from the water heater. Run the hot water in the kitchen or bathroom sink afterward to rinse it out thoroughly. |
| Sewer Hookup: Find a dump station in your area. Run some water down your sinks and toilet. Check for leaks as you dump the grey and black tanks. Make sure the valves open and seal well. This will also clear the anti-freeze out of your water pump and pipes. [NOTES: Check Sanidumps or RV Dumps to find dump stations near you.] |
| Water Lines: Check the PEX water lines for cracks or brittle areas. The composite material should be soft and pliable, similar to rubber. [NOTES: Red is hot; blue is cold; white could be either.] |
| Shore Water Hookup: The city water connection isn’t shaky. The gasket isn’t dried out. Run water through the city connection to look for leaks. |
| Toilet(s): Fill the toilet basin with some water. If the water level slowly decreases, you may need a new toilet gasket. [NOTES: Check your toilet’s manual for gasket part number.] |
| Kitchen/Bathroom Sinks: The faucet doesn’t drip, the handles aren’t loose, and there isn’t any corrosive build-up around the caulking. |
| Dishwasher: Check for proper operation, cracks in the hoses, and power cords. [NOTES: Use a sanitizing product to clean the dishwasher after storage.] |
| Washer and Dryer: Make sure both units run correctly. Check hoses and cords for integrity. [NOTES: Use a sanitizing product to clean the washer after storage.] |
| Sidewalls: Check the sidewalls for significant dents, cracks, loose seams, or other damage. [NOTES: Use clear silicone caulk to repair seams.] |
| Front Cap/Rockguard: Look for damage, loose seams, and other repair concerns. |
| Hood Panel/ Front Generator Bay: make sure the panel opens/closes smoothly and fits well. |
| Back Cap: Look for damage, open seams, or other concerns. |
| Air Conditioner Units: Open the A/C unit shells and conduct a visual inspection. Make sure the cooling fins are straight and the intake insulation is in good repair. [NOTES: A/C fin comb tools are cheap and are safe to use on your cooling fins.] |
| Roof Ladder: Check to see if the roof ladder is stable against the RV. Make sure any additional piece is stored correctly and in good repair. Check for any loose rungs. |
| Entry Steps: Grease steps that don’t expand smoothly. Test electronic step functions. Slide stabilizer legs on new ladder-like steps to test how well they slide and lock. [NOTES: Use WD-40 or something similar to grease steps.] |
| Awning: Open awning. Look for any rips in the fabric. Check for any burnt-out lights if they’re built-in. Make sure the electric mechanism moves smoothly. Manual awnings warp with age, so be mindful when closing up. |
| Exterior Panels: Open the water heater panel, refrigerator panel, and any others. Look for pests evidence, loose connections, damage, or corrosion. |
| Entry Doors: Make sure the weather stripping is pliable. The door and screen door open and close smoothly. The screen isn’t ripped. Friction doors should stay open the way at the angle you set them. Check the privacy shade’s functionality. Handles and locks work correctly. [NOTES: Weatherstripping should be conditioned 2-3 times a year to prevent drying out. There are sprays you can buy.] |
| Roof: Check the roof for damage, loose seals, mold, mildew, algae growth, and soft spots. Check all of your rooftop equipment for damage. |
| Air Conditioner Units: Open the A/C unit shells and conduct a visual inspection. Make sure the cooling fins are straight and the intake insulation is in good repair. [NOTES: A/C fin comb tools are cheap and safe to use on your cooling fins.] |
| Vent Covers and Sunroof: Check vent covers for cracks, misalignment, and other issues |
| Solar Panels: The panels are secured tightly to the roof. All connections are sound. Check for evidence of melting or burning on the contacts. Look for cracking or damage on the panels. Use a multimeter to check the output of the panels. |
| Awning, Slideout Awning, Window Awnings: While on the roof, check the fabrics of the various awnings for rips, tears, or any irregularities. |
| Slideouts: expand and contract smoothly. The warning sound works correctly. The slideout is connected to its track. |
| RV Skirting: Make sure the snaps or other connection devices are in good shape and none are missing. |
| Manual Slideout Retractor: You’ve located the manual retractor port and know where the specialized tool is |
| Slideout Awning Roller: Expand and retract the slideouts to confirm the slideout rollers operate smoothly. Check to make sure they aren’t loose on their hardware. |
| Outdoor Kitchen: Check all of the components of the outdoor kitchen, including the quick-connect propane connection. |
| RV Skirting: Make sure the snaps or other connection devices are in good shape, and none are missing. |
| Air Conditioner: By now, the A/C should’ve cooled the RV down. The units should sound right. Make sure you replace the air filters. |
3. Appliances, Electronics, and Interior

| Caulking: As you inspect everything inside, always be aware of loose or open gaps in caulking. Have clear silicone caulk with you to reseal bad spots. |
| Interior Lights: All of the lights turn on/off. Replace Burnt-out bulbs. [NOTES: Use a multimeter on the wires to see which one is not Receiving power if the light’s not working.] |
| Refrigerator: Check the results of the paper cup water test in the freezer and refrigerator. For a 3-way test, disconnect shore power and house batteries and house batteries to make sure it runs off the propane. [NOTES: See the RV Troop Preventive Maintenance article for the details of the paper cup water test.] |
| Stove and Oven: Check to see if the stove burners and oven light with the built-in ignitor. Many become useless after 4-6 months, so use a long-reach lighter to light each one. If one burner or the stove doesn’t light, there could be a blockage in the propane line. |
| Microwave: Test the functions of the microwave. Make sure the readout display is readable. |
| LED Fireplace: Check the functions of the fireplace and make sure it produces heat. |
| LED TVs and Multimedia System: Turn all of the TVs on/off and make sure the multimedia system functions properly. Check each speaker to see if they work well. Don’t forget the outside entertainment system. |
| Ceiling: Look for water stains, rips, mirror cracks, or other damage. Make sure all of the LED lighting works. |
| Molding: Check the floor, check the wall, and check that the slideout molding isn’t damaged or loose. |
| Fans, Sunroof, and Vents: Check all mechanisms for functionality. Look for any damage, seam leaking, or other irregularities. If the fan isn’t running correctly, use a multimeter to test the wiring. |
| A/C and Heat Vents: Check the vent covers to make sure they are still open/closed. Use your flashlight to see inside for pest evidence or other contaminants. |
| Flooring Conditions: Check for loose carpet threads, loose vinyl flooring, discoloration, damage, or corrosion. Check the edges of cabinetry for mold or other types of build-up. |
| Window Treatments and Shades: Inspect the window treatments for loose fabric or damage. Check the day and nightshades for tears. If the shades don’t rise, they may need to be re-threaded. |
| Walls: Look at the walls for damage, peeling wallpaper, bulging, or other problems. Check access panels for stripped screws. Open the panels up to inspect the electrical and plumbing behind them. |
| Cabinetry: Open all of the cabinet doors. Look for damage on all sides. Check hinges and struts to make sure they work correctly. Determine if cabinet doors are original. The doors may be slightly off-color, but they’ll match each other. |
| Drawers: Make sure the drawers aren’t falling apart. They slide nicely on their track, and they’re in good condition. |
| Privacy Doors and Accordion Walls: Open/close all doors and accordion walls. Make sure they’re on their tracks, they lock, and all of their pieces are connected. |
| Furniture: Check furniture fabrics, surfaces, and mechanics. Address tears, malfunctions, and missing pieces. |
| Master Bed: Check the platform under the mattress to make sure it’s stable. If the mattress is worn down, you may want to purchase a new one. Look at the storage area under the bed. Inspect it for pests, water, or other types of damage. |
| Bunkhouse/Bunk Bed Section: Inspect the mattresses, platforms, storage, and other features for damage, leaks, pests, or other issues. Don’t forget to check windows and secondary bathrooms thoroughly. |
4. Paperwork and Safety Equipment

| Control Panel: Check all functions on the RV’s control panel. For those with a mobile device app, check all the readings and functions on your phone or tablet. [NOTES: The black tank may not be accurate due to the sensors having a build-up of solid material.] |
| Alarms: Test all smoke, carbon monoxide, flood, and other alarms. Add fresh batteries at the beginning of your camping season. |
| Fire Extinguisher: Locate your fire extinguisher and check the expiration date. Replace it if it’s past the due date. |
| RV Paperwork Binder/Folder: Check to make sure you have the following paperwork inside your binder/folder: |
| The RV’s Owners Manual |
| Owners manuals for all features and amenities within the RV, including replacement components (i.e., new TVs, furniture, appliances, etc.) |
| A copy of all sales agreements during the lifespan of the coach |
| Current registration for the RV (you know where the title is) |
| Warranty and extended warranty documentation |
| Receipts of repair work, maintenance work, purchases of new features, storage contracts, and rental agreements |
| Any other necessary documentation (weight certifications, membership paperwork, etc.) |
How to Pre-Inspect Your RV (Video)
QUOTE:
"Man cannot discover new oceans unless he has the courage to lose sight of the shore."
-- Andre Gide
"Man cannot discover new oceans unless he has the courage to lose sight of the shore."
-- Andre Gide


