
We’ve seen the most reliable RV brands end up needing major repair work in the first five years, and some of the worst RV brands have performed flawlessly for years. RV service center managers tell people a good preventive maintenance routine avoids many common RV repair problems.
Conducting regular preventive maintenance will help you protect your RV. We’ll show you how a couple of hours of your weekend will avoid the expense of time, money, and effort down the road. You’ll see the benefits of preventive maintenance and what it means.
For more detailed inspections, professional RV inspectors can examine you. Finally, we’ll provide you with the tools and a printer-friendly travel trailer maintenance checklist to do it right the first time.
What is Preventive Maintenance for an RV?
What do you do to keep your brick-and-mortar home in good shape? You may clean out the gutters, change out the air filters, do some housekeeping, and replace the roof shingles every 10-15 years. Your motorhome or travel trailer has its maintenance needs to keep it in the best working condition.
As you can see from the video above, the Coachmen Apex has a solid internal construction. Most travel trailer manufacturers use this assembly line methodology to construct their products. Towards the end of the line, the construction team used weatherstripping, caulk, and other seals to keep the RVs weather-tight.
As your RV ages, it deals with road conditions, weather, the heat of the sun, and general wear through use. The rubber components try out, caulked areas form gaps, and other parts may shake loose. If moisture finds its way through a crack, mold, or mildew, it can start to break down structural supports or get into the ventilation.
Rodents and other pests like to find shelter in stored RVs or coaches that haven’t moved in a while. Generator insulation is a cozy nesting material for mice. How many of you have opened up your generator and had a mouse surprise you? After you calmed down, you wondered who was more scared: you or Mortimer (Mickey Mouse’s original name was Mortimer)?
RV preventive maintenance is a systematic inspection of the various components that make up your coach. The maintenance an RV requires is primarily visual, but some parts need a little more attention. The majority of work RV service centers see throughout the year comes from maintenance problems that owners could’ve caught early.
For example, a tire blowout may result from running on a bald tire. Diesel Class A motorhome tires can cost as much as $500 or more. Still, forensic-trained insurance adjusters can deny more expensive claims if they determine an accident was the result of user negligence.
Do RVs Need a Lot of Maintenance?
Depending on how much you use your motorhome or travel trailer, you should inspect your RV 2 or 3 times a year. Part-timers usually walk through their RV maintenance spreadsheet when they first open their coach for the season and winterize their RV for winter.
Using an RV maintenance log that takes you step-by-step makes sure you don’t miss anything and minimizes time because it usually organizes each step in a specific way. Some have you first inspect the automotive parts, the exterior, and then the interior features. Others will group the electronics and plumbing as separate sections.
It’s important to keep your RV inspection checklist with your notes in a file for a couple of reasons. First, if you can’t remember if you fixed something, you can always refer back to your previous walkthrough logs. Second, if you decide to sell your coach, buyers of used RVs always want proof of maintenance and repair work. These checklists can give you leverage during the price negotiation process.
If you want an RV maintenance app that tracks dates and mileage, look into Maintain My RV or Autosist. These apps send you text or email reminders when it’s time to change your oil or perform any kind of maintenance. If you need to print out or send a maintenance report, the programs create printer-friendly versions for you.
Common RV Maintenance Problems
Some maintenance issues are more prevalent than others. Keep a weather eye on your water lines, toilet, roof, and windows. Water and moisture can be just as dangerous to your RV as fire. Moisture breeds mold and mildew. Using a dehumidifier or DampRid inside your RV can keep the moisture level in your RV to a minimum.
The PEX pipes that direct your hot and cold water can decompose when exposed to the sun’s UV radiation. If you store your RV with dry lines, the PEX material will become brittle and crack. That’s why it’s essential to use anti-freeze liquids when you store your coach. During your inspection, you still want to look at the PEX piping to make sure it’s still soft and pliable.
The sun also dries out weather stripping and rubber seals around your windows. When this happens, the rubber becomes brittle, flakes, and shrinks. Window edges will leak air and allow inside climate-control temperatures to escape. The same issues occur with slideout seals. Use rubber conditioning sprays to remoisturize the seals and stripping.
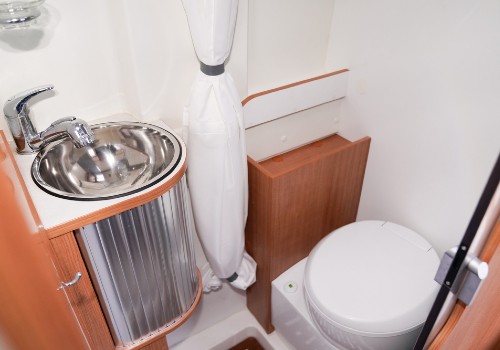
The toilet gasket is another rubber seal between the bowl and stand or toilet and black tank fitting (depending on the model you have). When the gasket loses integrity, the bowl won’t hold prefilled water, or water will seep from the side onto the floor. Your toilet’s owner’s manual will tell you the part number you need to replace the gasket.
Even if you have a porcelain toilet, using residential cleaners can degrade the gasket and black tank. Anything that has formaldehyde in it can corrode your RV toilet parts faster than average. That’s why RV experts warn you against using the blue toilet treatments. Find a cleaner that’s septic or RV-safe.
What Does an RV Inspector Do?
RV maintenance costs are a part of the RV lifestyle. Once you have your maintenance toolkit together (see the list below), keeping up with minor things like toilet treatment and other items is nominal. More significant maintenance issues like RV oil changes can set you back as high as $400 for luxury Class A motorhomes. Class A gassers, campervans, and Class C RVs can range between $80 and $175.
A great way to save money and become more knowledgeable about your motorhome is to learn how to conduct fluid changes or top-offs. After they’ve done it the first time, many people realize it’s easier than they thought.
You can defeat the fear of the unknown, under the hood of your motorhome (and passenger vehicle), with a step-by-step guide. You’ll save more than half the cost of an oil change at Camping World and have a feeling of accomplishment that you defeated a new RV problem you’ve never done before.
Yet, there are times when you do want a professional inspector to walk through your RV. During an RV purchase, you may need an objective opinion, there may be some complex electronics or automotive components that need experienced eyes, or you want to know what it’s really going to cost if you buy the Vintage Era (1945-1970) travel trailer you have your heart set on.
The National Recreational Vehicle Inspectors Association (NRVIA) trains, certifies, and monitors RV inspectors across the United States and Canada. You can find an RV Inspector near you by looking through their directory. All of their members are licensed, bonded, and insured. There are two levels of inspection, where the higher level sends engine fluids to a lab for testing.
The inspections can take a few hours and cost as little as $150 and go over $1,000. It all depends on the RV category and the level of inspection. Many inspectors live the RV lifestyle themselves and use the income to continue their adventures on the road.
What Does an RV Inspection Consist of?
For a clear example of what an RV preventive maintenance checklist covers, look at our Inspection Checklist on our RV Troop Website. You’ll see that it covers everything imaginable. Here’s what to expect when you perform your RV maintenance inspection to give you a broad overview.
Automotive
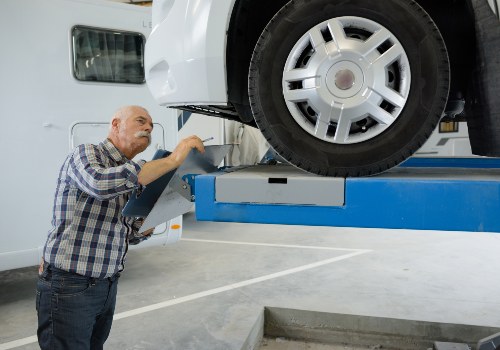
The automotive segment is primarily relevant to motorhomes, yet certain aspects such as chassis, hitch, suspension, and wheel components are also pertinent to towable RVs. Routine checks include pulling dipsticks to assess different engine fluid levels. Starting the engine and generator to listen for any unusual sounds, gauging the spark plug gap of the generator, and evaluating the battery’s performance using a multimeter are standard maintenance practices.
All RVs need their suspensions, tires, brakes, and axles visually checked over. Towables, especially pop-ups, need a grease refill into the ball bearings. You should find a tube similar to the tire refill tubes to insert the grease so you don’t have to take the wheel apart. While you’re under there, check the underbelly for any rips.
Both federal and state laws require your signal lights (commonly referred to as DOT lights for the Department Of Transportation), clearance lights, and reflectors in good condition. That means they work properly, none are missing, and they are in excellent condition. A cracked reflector, a missing clearance light, or a burned-out taillight can get you pulled over and ticketed.
Electrical
RVs have two fuse boxes: an AC box and a DC version. Motorhomes will have a third one for the automotive components. Check all of the multi-colored blade fuses and breakers. If the fuses show evidence of burning or melting, or the metal bridge inside is broken, it needs replacement.
European blade fuses are smaller and have curved edges compared to the block-like domestic versions. Make sure you purchase the correct type for your RV because fuse boxes that use domestic blade fuses will pop European fuses as soon as you insert them.
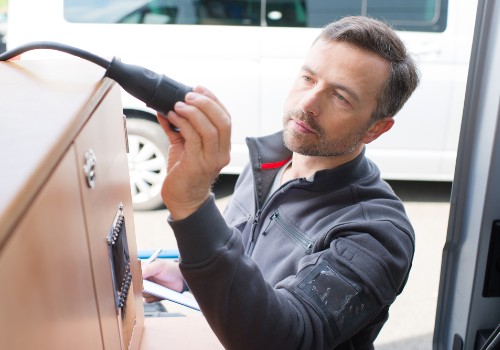
Use a multimeter to check your house batteries, solar panel system, appliances, and other electronic connections. Use an electric outlet tester for 110v outlets and a USB charger station tester, respectively. You can use a multimeter to check these outlets, but the testers are easier to use if you’re not a multimeter whiz.
Propane
If you have propane equipped, you’ll want to check the lines for leaks. The best way to do it is to use the soap bubble test at the various connection points. Check the lines themselves for any tears or openings. If the test fails, you may need to replace the line or propane connection part.
RV Troop Tip: The Soap Bubble Test– In a 10-ounce cup, put some liquid soap, non-staining food coloring, and water to thin it out. Use a coffee stir to mix it up. When it’s thin enough, pour a small amount on the propane connections. If it bubbles, the connection is leaking propane. The food coloring allows you to see it better, so use a bright color (red usually stains, so avoid it).
Plumbing
Want to Connect With a Community of Over 1,078 RV Enthusiasts?
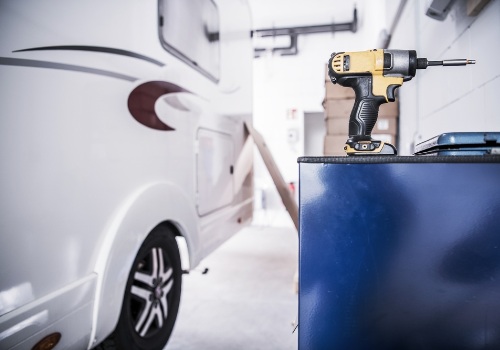
You can use the soap bubble test to check your internal water pipes. Use the screwdrivers to get inside access panels. It’s better to use a manual screwdriver than your electric drill so you don’t strip the screw head or internal holes. Make sure your water pump is off, and your external water connection is separated.
Inspecting your plumbing is one of the few times it’s okay to let your pipes run dry, as long as you connect back up as soon as you finish this inspection task. If you do find water, have some paper towels or rags ready to soak it up. If you can, grab your vacuum cleaner and give the enclosed space a good once over.
Check your drains, faucets, shower heads, toilets, and other water points for clogs or build-up. DO NOT use residential drain cleaners like Drain-O. Those chemicals are too strong for your RV pipes. Baking soda and vinegar can clean out your drains well. Don’t breathe it in because the two ingredients create carbon dioxide. Passing out in front of your spouse or kids would be one of those moments they’d never let you live down.
Exterior
When you inspect the exterior, keep the clear silicone caulk tube in your back pocket. While you’re checking the sidewalls, caps, roof, exterior bays, windows (windshield), and other parts, you’re always looking for gaps in the seals. Have the rubber reconditioning spray with you as you look over the windows and slideouts.
Use an RV slideout spray to refresh the lubricant on your slideouts. Look at the warning labels as you compare the products. If your slideout mechanism touches the carpet or flooring in your RV, you want to make sure it won’t affect it. Some of these lubricants can stain or decolor your flooring.
Interior
Your interior preventive maintenance will primarily consist of seals, component functionality, and evidence of corrosion. You’re looking at furniture, electronics, closets, cabinets, and every nook and cranny. Your biggest concern should be mold and pests. Insects and mice love to chew on things. Black mold exposure not only degrades essential structural parts but can cause respiratory issues.
When you perform “operation clean-up” on your RV, your vacuum and disinfectant products do a great job keeping a lot of this at bay. Dehumidifiers and air purifiers help your air conditioner filter do its job. It’s those in-between places you want to focus your attention.
RV Troop Tip: Refrigerator Paper Cup Test- Fill two 10-ounce cups with water halfway. Place one in the refrigerator and the other in the freezer. Write down the time and temperature of the mercury thermometers. Next, place a thermometer in each of the cups. After an hour, record the time and temperature of the thermometers again.
The RV refrigerator should be under 40°F (4°C). The freezer should hover around 0°F (-18°C). Keep testing every hour for up to 4 hours. If your refrigerator is significantly higher, you may need to take your refrigerator to an RV service center for repairs if a troubleshooting guide doesn’t work.
Loading Up Your Preventive Maintenance Tool Box
It’s a good idea to have a separate toolbox just for your preventive maintenance equipment. That way, it’s independent of your main tools, and the items don’t become lost in the shuffle. Here’s the gear we recommend you start with:
- 3 Coffee stirs
- 3 Disposable cups (10 ounces)
- 2-3 different colored pens
- 2 mercury thermometers
- Air conditioner fin tool
- Calculator (your mobile device calculator will work)
- Clear silicone caulk 2-3 ounce
- Dump station near me (Use Sanidumps or RV Dumps to find the closest dump station for grey and black tank testing )
- Electric outlet tester
- Flashlight (small but bright. Don’t use your mobile device’s flashlight app because you’ll be using the flashlight for long durations around electrical and plumbing components)
- Food dye (non-staining)
- Gallon milk jug (empty)
- Grease and dispenser
- Liquid soap (in a small sealable bottle)
- Multimeter
- Needle nose pliers
- Rubber seal conditioner spray
- Screwdriver (flat and phillips)
- Spark plug gap tool (the dime trick no longer works with modern spark plugs due to the precision needed for optimum efficiency)
- Tire tread measuring tool (the penny test isn’t reliable enough)
- Tire pressure gauge
- USB charging station tester
- Water (in a small sealable container)
- WD-40 (or another spray greaser)
Average Cost of Preventive Maintenance
When you initially set up your RV preventive maintenance toolbox, most of the gizmos and gadgets won’t be more than $10. Some, like a grease gun dispenser, may have a price closer to $20. A significant portion is household items you may have lying around the house. You’ll need to restock some supplies like the rubber reconditioner and the clear silicone caulk.
Expect to spend over $100 for your first toolkit. Following this, the cost for regular maintenance activities may vary between $20 and $40, with occasional replenishment of supplies being necessary. Additionally, using the nearest dump station might incur a fee of $5 to $10. When permitted by the campground, some RV enthusiasts may utilize local RV vacations as an opportunity to conduct thorough inspections of their RV, taking advantage of the available hookups to complete their checklist.
Let’s Get to Work
Now that you know what to do, print out the attached RV maintenance checklist to get started. If you’re buying an RV, you can also use the printout to inspect the used RV you’re looking to buy. Here at RV Troop, we want to make sure you’re fully prepared to succeed with your RV experience.
Make sure you bookmark the RV Troop Website and check in weekly for more helpful tips on all things RV. We’re constantly adding new content about what’s going on with the RV Industry, shopping guides, essential accessories, and how to camp like a pro.
Welcome to the RV Lifestyle!
RV Maintenance To Consider! (Video)


"Man cannot discover new oceans unless he has the courage to lose sight of the shore."
-- Andre Gide


