
Do you own an RV but don’t know what a battery disconnect switch is and when you should use it?
You’re not alone, as this lesser-known feature on many RVs can lead to confusion about its proper use to cut off power between your camper’s 12-volt lights and appliances and the battery bank.
To clear up all the questions you may have about an RV battery disconnect switch, I put all the info right here where I detail:
- The purpose of a battery disconnect switch
- The location of the RV battery disconnect switch
- How and when to use the disconnect switch for best results
- If your RV needs a battery disconnect switch
- How to install an RV battery disconnect switch
When you understand all the aspects of what a disconnect switch does for your camper, you’ll be able to use it to extend the lifespan of your RV’s batteries.
How Does a Battery Disconnect Switch Work?
A battery disconnect switch in an RV is a control mechanism to manage the electrical circuit connecting the RV battery. This switch enables or disables the battery’s ability to charge and power 12-volt devices and appliances. When activated, it allows the operation of various components like lights, safety devices, propane furnaces, water pumps, and, in some cases, A/C units and refrigerators.
The concept, though straightforward, is often misunderstood, possibly due to variations in DIY installations and the use of different converters or inverters. Generally, turning the switch on allows power flow, and turning it off disrupts the circuit, hence cutting off power.
Including a battery disconnect switch is not uniform across the RV industry. While it’s more common in newer RV models, older models might lack this feature.
A battery disconnection switch in an RV deals with the 12-volt power generated by the RV’s house batteries, not the 110-volt power typical of a home breaker box.
This switch offers a simple method to halt the power flow from the batteries to various components like power panels and interior lights. When turned off, it can also prevent power from the converter from charging the RV’s house battery.
In the absence of such a switch, the only alternative to control the power flow to and from the RV battery is to detach the main battery cable from its posts manually.
Should the Battery Disconnect Be On or Off?
Generally, it’s recommended to keep the battery disconnect switch in your RV turned ‘on’ unless the RV is being stored long-term. While often hotly debated in RV forums, this guideline aligns with the intuitive understanding that ‘on’ means active and ‘off’ means inactive.
For example, when you’re off-grid or not connected to external power sources (a situation known as boondocking), activating the disconnect switch (turning it ‘on’) will enable your lights to function. You can conduct this simple test, provided your batteries have sufficient charge.
Turning the disconnect switch ‘off’ deactivates the lights and may affect some major appliances and possibly certain safety devices. However, it’s common for safety devices to be wired directly to the battery, bypassing the disconnect switch. This design ensures these critical safety features remain operational regardless of the disconnect switch’s position.
When there’s no access to 120-volt power, the 12-volt system in an RV is capable of maintaining the operation of appliance control boards and igniting the propane system. This ignition is necessary for the water heater and furnace to function.
A common feature in RV refrigerators is a 12-volt display panel that’s essential for activating the 120-volt compressor, which keeps the refrigerator’s contents cool.
Experiencing refrigerator failure at a campground due to 12-volt battery issues can be extremely frustrating, especially when plugged into an external power source.
In some RVs, the lighting system is exclusively connected to the 12-volt system. Activating the battery disconnect switch to the “on” position will turn these lights on. Importantly, these lights should stay on even without the batteries, as most converters are designed to provide DC voltage to the appliances when the RV is connected to shore power.
How to Use Your RV Battery Disconnect Properly (Video)
Do RV Batteries Charge When Plugged Into Shore Power?
Yes, the house battery inside your camper uses shore power to charge.
The converter will take incoming 120-volt power, lower it to a safe level, and then send it over to charge your RV battery.
Typically, your RV’s batteries won’t charge when the battery disconnect switch is in the “off” position. However, this isn’t a universal rule; older or certain specific RV models might behave differently. This variability is a common aspect of the RV industry, where exceptions to general rules are not uncommon.
The converter in an RV plays a crucial role. It converts the incoming 120-volt power from shore connections to 12-volt power, which is used to charge your batteries. To check if your battery is charging while connected to shore power, you can use a voltmeter or multimeter – essential tools for any RVer.
New RVers often express concern about their battery charging while the disconnect switch is on and the RV is connected to shore power, mainly due to fears of overcharging. However, in most simple systems, the likelihood of overcharging is minimal unless connected to shore power continuously for an extended period, like a month.
There are two strategies to address this concern:
- Ensure your converter can supply DC power directly to the appliances, independent of the battery state. Most modern RV converters are designed with this capability.
- Consider installing a multi-stage converter. These converters automatically reduce to a trickle charge once the battery is fully charged. This feature is particularly beneficial for extending battery life and mitigating overcharging risks during prolonged shore power usage.
If you turn off your battery disconnect switch, you’re preventing the battery from charging. A dead or low-power battery will cause issues once you disconnect from shore power and try to use lights or start your furnace.
When to Use the Battery Disconnect Switch

The only time you need to turn off power to the batteries by switching your disconnect “off” is when you’re storing your RV or not planning to use it for over a week.
You may also need to cut power to the house batteries if working on your RV’s appliances or electrical system.
12-volt batteries slowly drain down over time, even when not actively in use. There’s typically a parasitic load pulling small amounts of 12-volt power, such as from amplifiers for the TV antenna or carbon monoxide detectors.
By switching off the power flow, you can keep your house battery from draining down too quickly during long periods of non-use, as well as prevent battery overcharge if you plug your RV in during times of storage.
Some people prefer to plug in their RV between uses, but be aware that converters can go bad and lead to battery overload.
A battery that runs down too low or overcharges will fail, resulting in an expensive replacement or possible damage to your camper’s deep-cycle batteries if they boil over.
Using the battery cut-off switch is another tool for proper RV battery maintenance that all owners need to follow.
Should the Disconnect Switch Be on or off While Towing?
Battery power is critical when towing a travel trailer, so you should never have the disconnect switch in the “off” position while traveling.
If you are using a 7-pin connector, one of the pins is dedicated to charging the battery in the trailer or RV.
If you look at the cap over the 7-pin connector on your vehicle, one of the pins will have a + symbol. This is the pin responsible for charging your battery.
Some RVers express concerns about damage to their vehicle’s alternator because they are charging their deep cycle batteries while on the go.
This isn’t the case. If it were, there would be no reason to include the charging pin.
The only exception is if you have an aftermarket, 7-pin connector installed with a larger wire gauge or are using an Anderson connector.
These scenarios may be enough to stress your alternator. If this applies to you, install a battery isolation manager to stabilize the flow from the alternator to the connector to the battery(s).
In some cases, if an emergency arises and the trailer unhooks from the tow vehicle, the trailer’s electric brakes cannot activate without 12-volt power.
Do You Use the Battery Disconnect if Your RV Has Solar Panels?
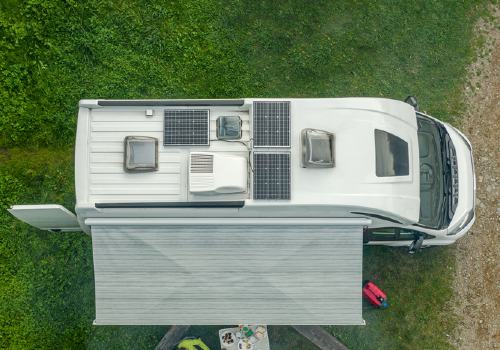
RVs with solar panels rely on their batteries more than those who spend most of their time camping while using shore power.
Many people who prefer dry camping often install solar panels to allow longer trips off-grid, so keeping house batteries at full charge is crucial.
Again, there are always exceptions to the rule. However, in most cases, solar panels are wired to your converter and then to your battery bank, bypassing the disconnect switch altogether. In most circumstances, your solar panels will charge your battery(s) whether the disconnect switch is on or off.
As with shore power, there are concerns that overcharging using solar power is a possibility.
This is even less so with solar power since shore power is a 24/7 constant, while solar power is dependent on sunlight.
The best solution for RVs with solar panels is to use a battery tender in conjunction with your solar panel system controller to allow batteries to take in as much power as possible without the worry of overload.
Will Rockwood Solar Charge the Batteries When the Battery Disconnect Is off (Video)
Proper Set-Up Sequence for Charging Batteries on Shore Power
This is more of a guide for setting up overall than it is for charging your batteries, but it covers the same thing.
Now, every RVer does things a little differently, maybe flipping one sequence for another when appropriate.
Think of the following as a general guideline and make your own adjustments to facilitate your personal, simplest method:
- Arrive at the campground
- Locate the pedestal and determine that it is off, and turn it off if it’s not
- Look at the condition of the receptacle to ensure it isn’t damaged and you don’t see any scorching or burns
- Flip the breaker on and plug in a surge protector, or use a multimeter to determine the safety and amperage of the receptacle
- Once you’ve determined the safety and amperage at the pole, turn off the breaker
- Plug your RV in
- Turn on the breaker
- At no point throughout this process does it matter if the battery disconnect switch is on or off since you’re testing the power from the pedestal before you bother connecting the RV
The sequence is fairly simple, with the most important consideration being safety. You never know what might have happened from the previous RVers in that spot and the time you arrive. Always check and verify your shore power source before plugging in.
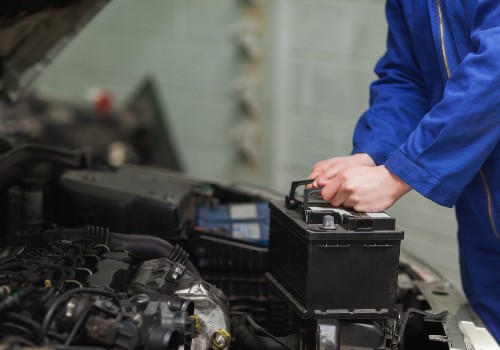
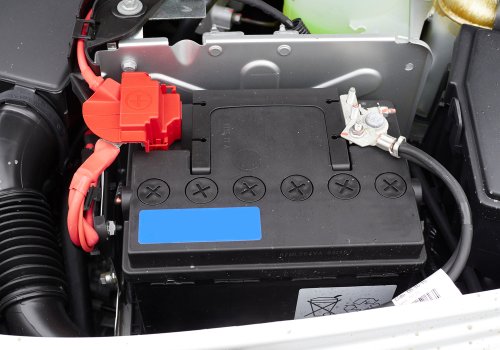
Where Is the RV Battery Disconnect Switch?
The RV battery disconnect switch location depends on the type and model of camper you have and whether or not it came standard or was an add-on part.
Inside the Camper:
Look for labels with “battery” or “battery disconnect” inside the RV near a red switch.
The switch is often by your other power panel components or otherwise set in a cabinet or wall in the area near the battery compartment.
Inside the Battery Compartment:
The switch for the battery disconnect is often inside the storage compartment that houses the RV’s batteries. Most often, this compartment has an exterior door that is near the rear of your motorhome or travel trailer.
Sometimes, batteries on smaller trailers are on the front of the camper above the hitch. The battery may be inside a metal or thick plastic bin, with the switch on the outside for quick access.
On the battery bank:
On most after-market disconnect switch installations, you’ll find the component directly on one of the batteries in the bank (if you have more than one.)
The switch may have a knob or a lever you twist or pull into the “on” position. Depending on the switch’s design and space on the battery, the controller will be sitting directly on top or next to the battery.
Depending on the number of house batteries you have in your camper and how they connect may also determine where to find the switch.
As a general rule, look for the disconnect component in the negative cabling line because this is an excellent place to create a grounding break between the battery and the RV chassis.
If you don’t spot the controller after a good search, remember that not all recreational vehicles have a battery disconnect switch. The good news is that you can easily install one if you wish, and the disconnect kits are very affordable.
Do You Need an RV Battery Disconnect Switch?
Want to Connect With a Community of Over 1,078 RV Enthusiasts?
A battery disconnect switch isn’t a requirement, but it sure is a handy way to:
- Prevent accidental battery discharge
- Avoid battery overload
- Maintain the integrity of your RV battery
- Eliminates the hassle of manually detaching battery cables to cut power flow
Access to the batteries in many RVs can be challenging.
Most RVs have the batteries inside a solid container bolted to the floor to prevent it from tipping over. The batteries are often set back into the compartment to allow more room for storage.
Trying to get into the tight compartment space or lift out a heavy battery from the container to access the cables and posts to control battery power is not easy, so having a disconnect switch is a much easier option.
How to Install an RV Battery Disconnect Switch
DIYing an RV battery disconnection switch isn’t complicated, but if you feel uneasy, hire a professional mechanic to handle the task.
Dealing with even 12-volt power can cause sparks, shocks, or burns if you don’t know what you’re doing. Use eye and hand protection for DIY installation to be safe.
Another thing to consider during the switch installation is to spend a few minutes inspecting and cleaning off any debris or corrosion from all your battery terminals to ensure good connections.
Step 1. Buy the Right Switch and Cables for Your RV’s Battery Load
Find the voltage output of your house battery bank and purchase a disconnect switch the matches the rating.
If you don’t buy the right switch, it could fail during use, causing RV electrical problems that you may not immediately blame on a faulty switch.
Depending on the installation location of the new switch, you may need to purchase longer battery cables. Make sure you plan out where your controller is going so you can have everything you need on hand to complete the job.
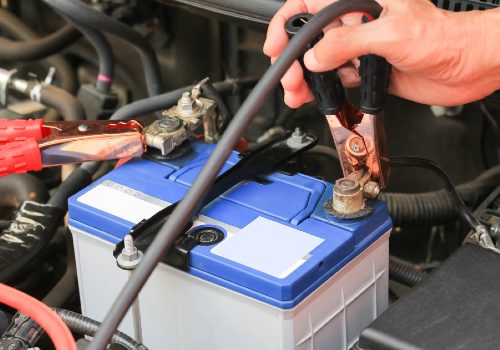
Step 2. Disconnect the RV Battery
Find the cables on disconnect switch posts, and using a wrench, remove the ones that bring power into the battery bank and the one that will attach to your disconnect switch.
For safety, always remove the negative cable first from the battery and reinstall them last to avoid shorts.
Check out this helpful post on where to attach the disconnect switch in multi-battery RVs.
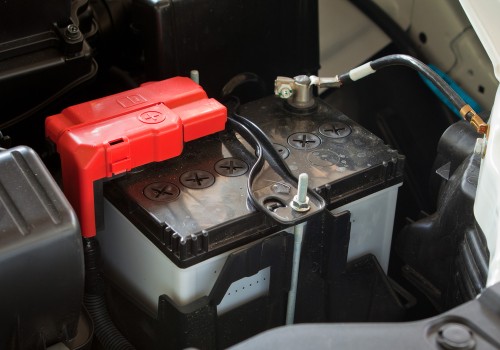
Step 3. Disconnect the Negative Cable Terminal and Wire the Switch
After you remove the terminal from the negative post, you can install the cable switch between the battery terminal and the line heading into your camper’s converter box.
Follow the directions in the specific disconnect switch you purchase to hook it into the cable line. Make sure the control is in the “on” position during the installation.
Some disconnect switches are directly installed onto the positive battery post and do not require mounting, as shown in this video on how to install an RV disconnect switch.
How to Install an RV Battery Disconnect (Video)
Step 4. Mount the Battery Disconnect Switch in the RV
Before you hook the cables back onto the RV battery, mount the battery cut-off switch in a convenient location so you can quickly turn the coach batteries on or off.
Many people attach it to a sidewall inside the battery compartment. In contrast, others prefer to drill a hole and mount it for access inside the camper or outside the large battery housing box on travel trailers.
Step 5. Reattach the Terminal to the RV Battery Negative Post
With the switch in place and mounted, you now need to take the end and reattach the terminal to the negative battery post.
Double-check that the switch is still in the “off” position to prevent any power flow until you are ready.
Step 6. Reattach the RV Battery Cables to the Poles and Test Switch
Lastly, reattach the loose cables to the poles (positive and negative that you took off) in the proper positions.
Turn the switch to “on” to allow power to run through the battery and test to ensure it’s working correctly by seeing if 12-volt lights inside your camper work while not plugged into shore power.
Final Thoughts

The battery disconnect switch is a simple tool to optimize the health and longevity of your camper’s battery.
The RV battery disconnect switch isn’t a complicated feature when you understand how it works and the best time to use it.
I hope this guide clarifies the purpose of the battery cut-off switch and helps you install one if your RV doesn’t have one in place.
Everyone wants to enjoy camping trips more, so keeping your RV’s batteries in top condition by using a disconnect switch correctly is a smart move!


"Man cannot discover new oceans unless he has the courage to lose sight of the shore."
-- Andre Gide


I’m not sure where you’re getting your info, but great topic.
Can disconnect switches be operated by rotated in either direction?
The most helpful article I have found!
Have been going back and forth with myself and partner trying to get it right, always ends in confusion. And a dead battery 😑
Most everyone, including the technicians at my RV dealer, says that when the battery disconnect is turned on, that means the battery is on/connected.
This is contrary to my interpretation (and yours) of what battery disconnect means.
In actual fact though, on my travel trailer, when the battery disconnect switch is turned to on, the battery is indeed on.
Agree. When my battery disconnect switch is in the on position my coaches batteries are connected and I am getting power from battery to the Coach. When my coaches battery disconnect switch is in the off position, my coaches batteries are disconnected and the coach is not receiving power.
I believe that most people who read this article will assume that the words “on” and “off” refer to the writing on the battery disconnect switch. my switch also has an actuator out position. This allows the disconnect switch knob to be completely removed from the coach.
Thanks for the great article.
Great article, thank you. Quick question: When my battery disconnect is on and I am not connected to shore power, should my lights work? I feel like in this instance there shouldn’t be any power to the lights etc and was using that as a way to test if my disconnect was working, however, when my disconnect is turned to “on” the lights in the trailer are working and the radio display is visible. I’m confused.