
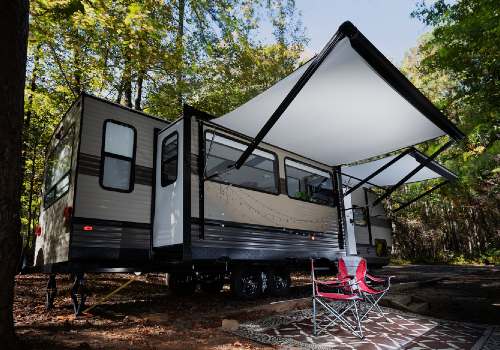
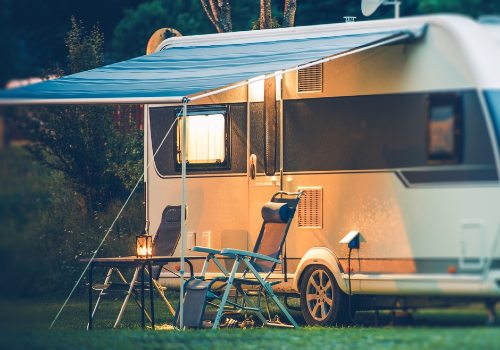
A camper awning is one of the most heavily used RV amenities.
At some point, every recreational vehicle owner will need to repair torn camper awning material or replace it entirely due to:
- Wind
- Heavy rainfall
- Falling branches
- Age
- Extreme temperature fluctuations
- Floating embers from campfires or fireworks
Many products to patch or replace a camper awning tout themselves as “the best” or “permanent” but do they perform in real life?
As a full-time RVer, I’ve had to patch or replace my awning several times over the years, and I know what works and what doesn’t. I want to share my experience with my fellow RVers to save you time, money, and frustration.
When you know what to expect when repairing an RV awning, you can purchase the right awning repair products, so your DIY or professional awning repair goes smoothly and lasts long-term!
Types of Camper Awning Repair Products
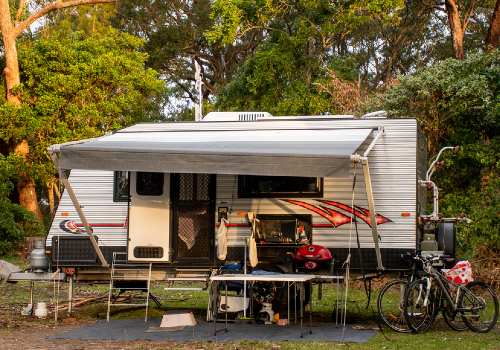
Smart RVers always have a stash of emergency camper supplies, which should include an awning repair kit.
You never know when damage to your awning will occur. There’ll be times when the awning patch kit won’t fix the issue to your satisfaction, but it will temporarily hold things together so you can drive the camper without causing even more damage to the fabric and metal structure.
These kits can also work to repair damage to the material on pop-up campers. You can find fabric repair kits for:
- Canvas awnings
- Vinyl awnings
- Acrylic awnings
Let’s go over the different awning repair kits so you can understand how each type works.
Awning Repair Tape
Repair tape for camper awnings comes in various widths and lengths to handle tears of any size.
Some tape is clear, while others come in colors (mostly white or tan), so you can match it to your awning, so the repair is less noticeable.
The ingredients of the tape and adhesive vary to bond securely to a specific awning material fabric.
Awning Repair Glue
Glue for RV awning repair use chemicals that form a strong adhesion to vinyl, acrylic, or canvas material.
Using the correct glue for your awning type is crucial for a successful, long-lasting repair.
Awning Repair Patches
Patch kits for awning repair are fabric blocks or strips and often include a compatible adhesive glue or needle and thread if it’s a sew-on style.
Some awning manufacturers sell repair kits to match your existing color and type of canopy material, while generic versions typically offer white, tan, and black patch colors.
Things to Consider Before Repairing Your Camper Awning
Fixing a camper awning with holes or tears will be the same process no matter if you have a travel trailer or motorhome.
Do you have to remove the awning to make repairs? In many cases, you can patch the camper awning without going through the hassle of taking it off your RV, especially when fixing a hole.
You’ll most likely need to loosen the awning fabric to have enough slack to repair a tear properly.
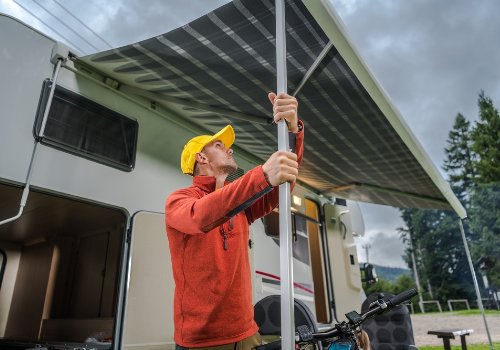
Both manual and electric awning repair will follow the same steps, but it’s much easier to fix a torn awning on a manual canopy system in many instances.
Manual canopies allow you to lower the legs when the awning is open for closer access to the damage for inspection and repair.
Overhead awning repair on electric models is often challenging as the unit is set much higher on a camper than a manual version, making them harder to reach.
Expect to use a tall ladder and only patch from below on areas in the center of the awning since you will only have full access to patch around the edges.
How to Fix a Torn Camper Canopy
The supplies you’ll need to fix a camper awning are:
- Repair tape or patch kit
- Rubbing alcohol and rag
- Scissors
- Ladder/Stepstool
- Duct tape
For both tears and holes, follow these steps to repair an RV awning:
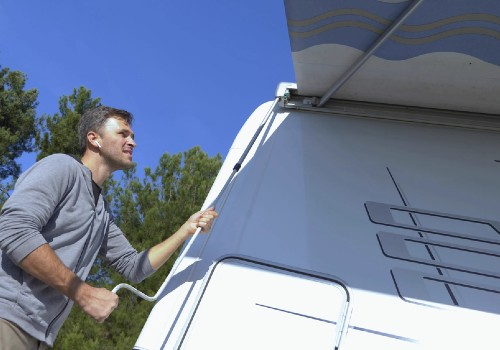
Step 1. Access the Damage
You can’t fix the awning if you can’t safely reach the area of damage. Lower the canopy, climb on the roof, loosen the material if necessary.
Bring out a ladder to safely reach the area you need to patch if you can’t access it from the ground or the roof of your camper.
Step 2. Clean the Edges
You must clean off any dirt, sap, or grease from the fabric edges so your repair products can adhere properly.
Apply rubbing alcohol with a rag or cotton ball to both sides of the material several inches in around all the edges of the damage.
Go over the material several times until all debris is gone, and let it air dry.
Step 3. Apply the Patch
For glue patch kits, you’ll spread a layer of adhesive around the awning rip and apply the fabric patch on top. Press the patch down firmly and allow the adhesive to dry before tightening your awning to its normal position.
For canvas sewing patch kits, place the patch over the awning tear and use a curved upholstery needle and heavy-duty thread to sew it on. You can use only the thread to pull together short tears.
The purpose of the curved needle is to easily bring the thread back down through the awning fabric since you most likely won’t be able to access both sides of the awning at once.
You only need to cut a section large enough to cover the damage by a few inches for tape repair kits. Rub the tape to achieve solid contact with the awning material, especially around the outer edges.
For larger holes or tears, add an additional layer of awning tape on the opposite side of the awning for more strength. Give the tape several hours to form a good bond before stretching out your awning.
TIP: To relieve pressure while glue or tape sets, add large strips of duct tape over the repair, taking care not to press the duct tape against the repair section only onto the stable awning fabric.
WARNING: Don’t let anyone fool you with their “awning repair steps” that gloss over the removal and replacement of your awning fabric. It’s especially infuriating to see this recommendation for repairs you can do while the awning remains on the camper.
Changing out your awning material is not a one-person job, nor is it very simple, especially if you have a huge canopy.
Be aware that pulling an awning from its track is simple, but putting it back is not and requires patience and two or three people to feed the material into the slim openings.
Don’t get me wrong, I’ve done a solo 14-foot DIY awning replacement, but it was a nightmare that took hours! I could have had it complete in maybe 30 minutes with some help, so don’t tackle this project alone if possible.
Best Repair Kits for Patching Awning Tears or Holes
While many products are on the market to patch an RV awning, some only provide a short-term fix before it fails.
Most low-cost “clear” tapes quickly discolor and make your awning repairs stand out. Many tapes and patches curl up along the edges or start to peel up entirely after a short time.
Some tapes or adhesives loosen when wet or hot and allow the tear to open back again.
To avoid spending money on poor-quality RV awning repair kits, stick to these top-performing brands in the sections below.
Best Awning Repair Tape
A top choice for reliable repair of vinyl and canvas awnings is FixMyTear tape. The UV-resistant tape is clear, won’t discolor, and the chemical bond creates a super-strong repair that lasts through all weather extremes.
Another great brand for awning repair tape is XFasten. The clear tape comes in two widths to custom fit your damage. The tape is affordable and doesn’t budge through all types of stress on the awning from weather and use.
My third recommendation is the Life Safe long-lasting clear tape made for sail repair. The tape withstands harsh weather, salty air, and extreme stress.
TIP: A generic roll of awning repair tape will only last through about 14 days of exposure before peeling, curling, discoloration, slipping, or cracking begin to occur.
Many RVers opt instead for a roll of transparent Gorilla Tape that works equally well on the awning, as you can see in this video.
Best Awning Repair Patch Kit
For canvas awnings, the Outfitters Supply patch kit comes with everything you need to fix tears fast.
The Vinyl Repair Kit by Quick 20 allows you to color-match to your awning and requires no heat. This kit is best for holes or small repair needs but works and looks great.
Using a patch of your awning material with VLP Adhesive by Plasti Dip forms a tight and long-lasting bond. You can use the adhesive solo for small holes or tears.
Want to Connect With a Community of Over 1,078 RV Enthusiasts?
Many RV awning manufacturers will sell material patches that match your awning type or color. Call the company’s customer service and ask if they can send you a few patches to keep in your emergency repair kit.
Another great source of vinyl material patches is a local shop specializing in outdoor or marine reupholstery services.
Reasons to Replace Instead of Repair Your RV Awning
Next are examples of when it’s best to replace your camper’s awning:
- When tears occur down a long length of the top or bottom stitching seam, a patch repair will not be able to withstand the pressure the heavy roller bar puts on the fabric when open.
- Large jagged holes from a branch falling through the material will also be very difficult to patch cleanly, and full awning replacement is the right solution.
- Too many awning patches look terrible and lower the value of your camper even if they are holding up well. Some campgrounds may take issue with a ratty-looking awning and ask you to leave it shut.
- Overall dryness, cracks, peeling, or heavy mildew on the camper awning weakens the material and is a great indication it’s time to replace the whole thing.
Awning Replacement Fabric – Which Is Best and Why
What Is the Best RV Awning Replacement Fabric?
The answer depends on your budget, RVing lifestyle, and the type of camper you own, so let’s go over the differences.
Vinyl
Vinyl is the most common RV awning fabric as it’s less expensive and provides a waterproof, easy-to-clean surface.
The downside to vinyl is it can quickly mildew under humid conditions, and the surface will crack, peel, and fade after several years of use.
Acrylic
Acrylic fabric is woven so air can circulate through the awning, meaning people sitting underneath will feel cooler.
The material fibers dry fast and are extremely tough, so sun, rain, ice, wind, and dirt will take a very long time to show wear or fading.
On the downside, acrylic camper awnings are more expensive to buy.
Canvas
A high-quality canvas awning can cost the same as vinyl, but unless you spend extra to treat it with a fabric protectant, it won’t last nearly as long under the stress of sun and dirt.
An untreated canvas awning can become very heavy when wet, which requires you to roll it in during rain to prevent damage to your awning structure.
How Much Does It Cost to Replace a Camper Awning?
To give you an idea to purchase a camper awning replacement, here is a cost comparison between fabric types for a 16-foot-wide awning:
| FABRIC TYPES | PRICES |
| Vinyl | $175 |
| Acrylic | $450 |
| Canvas | $120 |
The cost is only for the material and not for any installation charges. Also, be aware that storm damage to your awning fabric also includes damage to structural parts that may add to your repair bill total.
8 Awning Maintenance Tips and Tricks to Reduce Damage
1. Retract the awning whenever you leave the camper as storms can suddenly appear.
2. Use screw-in stakes and rope or ratchet straps to hold your open awning taut to prevent wind from picking up the outer edge, which causes tears. Wide awning deflappers are another great tool for manual awnings.
3. Always lower one side of your awning a few inches to allow rain to run off and not pool on top, which is very heavy and will cause tears of the fabric or collapse the metal frame.
4. Always roll up your awning when it’s dry to prevent mold and mildew from eating away at the material.
5. Wash your awning top and underside often with a gentle soap and water solution and a soft brush. For stubborn stains or mildew, spot clean with a mild bleach solution and a magic eraser.
6. Inspect your camper awning every time you open it to catch any wear and tear before it gets worse.
7. On awnings in good condition, consider a preventative layer of tape over vulnerable areas, such as the upper edge where it meets the camper and the outer edges that catch the wind.
8. Use a removable awning cover during travel or storage to keep it clean and protect it from the elements.
Dried Out Ripped Camper Awning Repair


"Man cannot discover new oceans unless he has the courage to lose sight of the shore."
-- Andre Gide


