
If you own a recreational vehicle, you probably give no thought to your RV plumbing vents. That is, until they clog up or break, which can quickly cause big problems.
Learning how to replace an RV plumbing vent and why they are important is part of keeping your motorhome, travel trailer, or fifth wheel in top condition.
Inside this guide, I give you all the details about what signs to look for to know your plumbing vent isn’t working correctly, how to install a new plumbing vent, and which RV plumbing vent brands are best and why.
RV trips are much more fun when you don’t have to worry about issues with your plumbing system, so stick around to learn more!
The Purpose of an RV Plumbing Vent
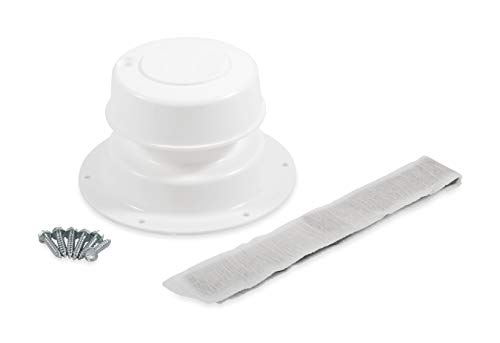
- Fits 1″ to 2-3/8″ O.D. pipe
- Includes vent plus
- Includes all hardware and putty tape needed for installation
- Easy installation
- Durable and long lasting
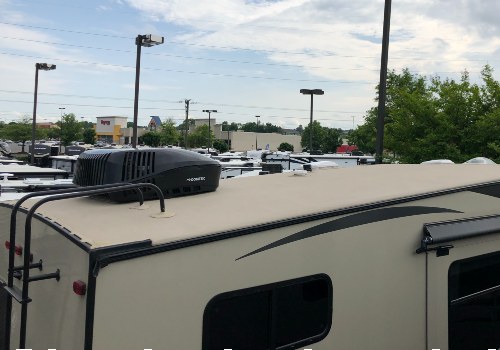
RV plumbing vents sit on the roof of your recreational vehicle and attach to the top portion of the vent piping that runs upward from your wastewater holding tanks and sink and shower drain lines.
Unfortunately, many RV builders use a basic, low-cost plumbing vent cap that does little to stop odors. Instead, the design encourages backflow of air down the pipe during travel, which leaves a wonderful sewer smell surprise when you open the camping trailer door upon arrival or while driving your Class A or Class C motorhome.
The plastic material of these standard vents is notorious for drying out and cracking in short order, leaving many RVers unaware that they are driving around with a broken or missing vent cap. Once they realize the issue, they nearly always upgrade to a better-quality vent cap for RV use.
Only RVs with running water and bathrooms will have plumbing vent pipes and caps.
The vent pipes are not the same as the drain lines in your camper, although they look very similar. Plumbing vents allow the removal of gas and odors from your RV waste tanks and regulate the air pressure within the tanks and drain lines.
If your RV plumbing vent isn’t working correctly, you can expect problems such as:
- Slow-draining water in showers and sinks
- The toilet won’t flush correctly
- Waste tanks chug when you empty them
- Sewer gas backfilling your RV
- Water leaking through the RV roof
A functioning plumbing vent will allow air to travel in or out of the pipe and holding tanks so water can flow freely.
The vent also lets odors rise from the tanks and discharge outside your RV, so you don’t suffer from stinky and often poisonous levels of sewer gas inside your camper.
A clogged vent pipe will block odors from rising and instead allow them to enter your RV directly when you open the valve to flush the toilet. If you’re running your bathroom ventilation fan at the same time you flush, the problem only intensifies!
Assuming any foul odors inside your RV are only coming from the black tank is a mistake. Many RVers are frustrated when they replace the plumbing vent cap on the black tank, and the problem persists.
It pays to remember that your grey waste tank also has a vent pipe that may also need a replacement. The tank contents can create a dreadful stench, even though the fluid is mainly soapy water, body oil, and food particles.
Since the plumbing vents on the roof are in constant exposure to the elements and low-hanging branches, they often deteriorate, crack, or get knocked off.
Depending upon the damage location, it may open up a gap between the roof membrane and your RV interior, which can allow water to leak in when it rains or you wash the camper.
Clogs are common in RV plumbing vents, especially if you store your camper outside or park in one campsite for a long time. Nesting birds and critters and flying leaves or other debris can fill the gaps in the vent, which stops the airflow in or out.
Thankfully, fixing RV plumbing vent issues isn’t complicated or expensive, so follow the steps below to replace a faulty vent.
How to Replace an RV Plumbing Vent
First off, let me clarify that you’ll only need to replace the top or cap of the plumbing vent to increase the efficiency of your plumbing system.
The long pipe or stack that rises from the waste tanks rarely needs any replacement outside of a full RV renovation project. However, you may need to flush it with water or clear it with a long rod if a blockage is within the pipe itself.
Follow these steps to replace an RV plumbing vent:
Step 1. Empty and Flush Grey and Black Water Tanks
It’s always a great idea to clean and drain your RV’s grey and black water tanks before working on the vent caps.
The cleaner your tanks, the less odor will emit from the vent pipe when you’re working on the roof to replace the cap. But, trust me, when you are next to the vent, you will have the joy of direct sewer gas exposure, so try to work upwind of the pipe during the RV plumbing vent upgrade to decrease inhalation of the fumes.
How to Empty and Clean Your RV Black and Grey Water Tanks (Video)
Step 2. Clear Away Old Caulking and Unscrew the Vent Cap
Most RV vent caps have years of caulking built up around the edges that will need removal, so you can access the screws to remove the cap from the top of the pipe.
A putty knife is an excellent choice to get under the caulk and lift it without the damage a razor knife could cause to your RV roof membrane. Go around the vent and peel away as much caulk as possible to expose the base of the old vent cap.
You’ll also need the edge of a small flat-head screwdriver or an awl to clear away any caulk stuck in the screw heads.
Most vent caps will have four to six small screws around the perimeter of the base that hold the cap securely to the roof.
Remove the screws, and use the putty knife again to lift the cap off the pipe. There may or may not be caulk under the edges of the vent base, so be ready to use some effort to pry it loose if it does.
Take care not to drop any old caulk or other debris down the vent pipe.
Step 3. Clean Roof Membrane and Install RV Vent Cap Replacement
Once you remove the old RV plumbing vent cap, go around the vent pipe coming through the roof and clear away any caulk residue using the putty knife and a solvent if you need it.
You want the surface to be nice and clean before installing your replacement vent cap so the new caulk will bond tightly to the RV roofing material to prevent leaks.
Depending upon your old vent stack install and the brand of new vent cap, you may need a hacksaw to cut down the length of the pipe that extends through the roof.
The installation instructions for the new vent cap will state how much pipe extension you need. For example, the old stack may have been four inches above the roofline, but the new vent cap may only fit if the pipe is 1 1/2″ above the roofline.
A hacksaw or tiger saw will quickly cut through the PVC pipe material. Just be sure your cut is even across the top for a tight fit when you place the new cap.
Set the new RV vent cap in place and screw it down. Follow the manufacturer’s instructions for installation, but a bit of caulk sealant/adhesive under the edge of the base gives the vent extra stability.
How to Replace an RV Plumbing Vent (Video)
Step 4. Seal the Roofline around the RV Plumbing Vent Cap
Use a high-quality RV roof caulk, such as Dicor Self-Leveling Lap Sealant, around the edges of the vent cap and over the screw heads. The caulk will prevent water from leaking into your RV roof and prevent the screw heads from corrosion or wiggling loose during travel.
3 Best RV Plumbing Vent Replacements
There are different choices when shopping for an RV plumbing vent replacement. While you can find exact replacements for your current RV vent cap, in most cases, it pays to change it out for a more functional product.
You can significantly improve your RV plumbing vent situation with a few more dollars to buy a vent with a better design.
The three models below are the top RV replacement vent choices worth consideration.
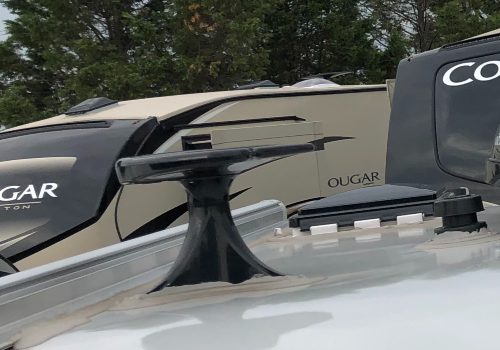
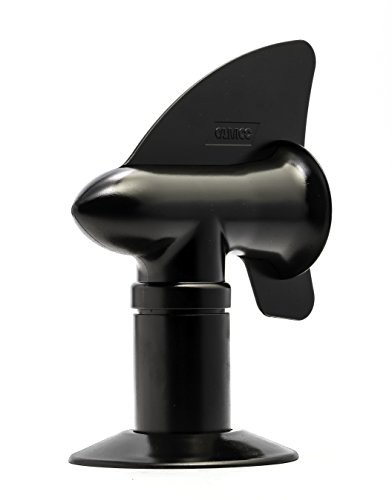
1. Lippert Components 360 Siphon RV Plumbing Vent
- Eliminates Odor - Exhausts Odors Out The Roof Vent Before They Have A Chance To Invade Your Rv
- Compatibility - Engineered For A Universal Fit, The 360 Siphon Is Compatible With All Rv Vent Caps
- Durability - Built With Polycarbonate, The Sophisticated, Patented Design Of This Vent Has No Moving Parts
- Keeps Pests Out - A Built-In Screen Helps Ensure Bugs Stay Out Of Your Rv, For A Worry-Free Camping Experience
The 360 Siphon RV Roof Vent Cap by Lippert is one of the highest-rated plumbing vent replacements by RV owners, including myself.
Want to Connect With a Community of Over 1,078 RV Enthusiasts?
Why it’s a top choice: The patented 360 Siphon design only allows the air in the pipe to updraft, even when the RV is stationary. This feature eliminates the fear of odors and harmful gases back-drafting into your camper.
The sizing of the 360 Siphon is universal, making it easy to upgrade the vent on any size or type of recreational vehicle.
The polycarbonate material is extremely robust. I’ve had mine in place for eight years now, and it still looks and works like new.
The design prevents the need for moving parts, which lowers the chance of malfunction, and the built-in screen keeps leaves, bugs, and small critters out to stop clogs.
Once you install this vent cap, which comes in black or white to match your RV, it requires no maintenance aside from ensuring the caulk surrounding the flange remains gap-free and wipes off the dirt.
So, unless you break it off by driving under tree branches or a bridge, it should last for a decade or more, making it an outstanding value.
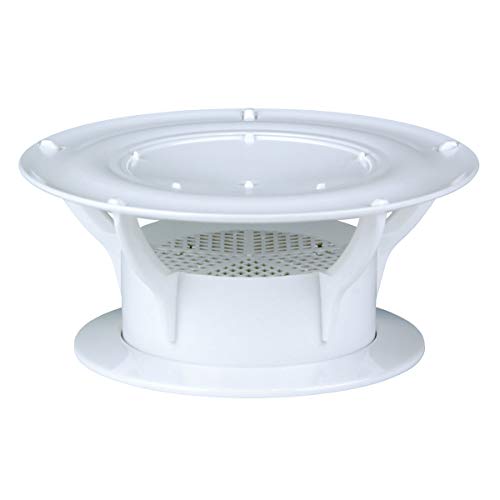
2. Camco Cyclone Rotating Sewer Plumbing Vent
- Use the power of the wind to draw holding tank odors out of the RV
- Rotates 360 degrees to follow the wind
- Attaches easily to most RV plumbing vent
- Black in color
- No drilling into your rooftop
The Camco Cyclone Rotating Sewer Plumbing Vent is an affordable but more efficient and reliable RV vent cap that uses even slight breezes to pull up and direct sewer gas and odors away from your camper.
Why it’s a top choice: The design allows you to quickly install it on your RV roof with no need to drill holes or insert screws. The head spins automatically to catch the wind and harness it to draw out foul odors so that it won’t create a backdraft in your RV.
The material of this vent cap is durable, but the height it sits up off the RV roof may cause issues if you’re already maxing out on safe clearance. While the majority of RV buyers love how well this vent works to eliminate odors, there is a chance the top could get knocked off, broken, or lost during travel or parking.
Another concern is the possibility of clogs at the exit if insects or birds decide to build a nest in the openings, as there is no screen to keep them out.
3. Ultra-Fab Mini Solar Plumbing Vent
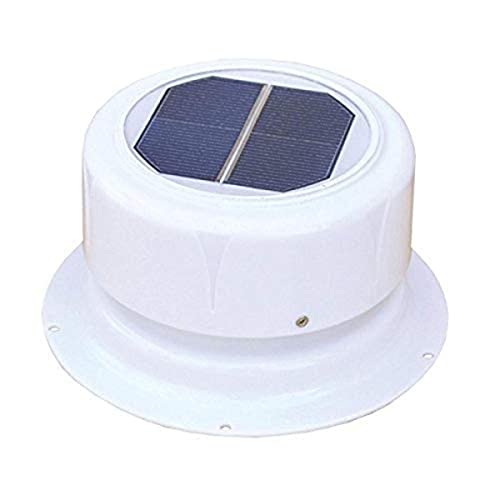
- Silently and automatically removes RV plumbing odors and moisture.
- Replaces most RV plumbing caps while aerodynamic design provides for less drag co-efficiency.
- Installs easily on RV roof top.
- Solar powered start and stop so there is no wiring required.
- Manufactures 1-Year Warranty
The Ultra-Fab Mini Solar Plumbing Vent is more expensive than other RV vent caps but offers a fan to help expel foul odors fast.
Why it’s a top choice: The fan operates silently on solar power, so there is no need to install batteries or hard-wire the unit. In addition, the extra draw from the fan keeps airflow rising in the vent pipe to stop odors from penetrating your RV.
Other features that make it worthy are the durable material and the easy fit over an existing RV vent pipe. The low profile also isn’t a distraction on the camper roof.
Do note that the only downfall of this RV plumbing vent cap is the poor seal against the weather around the solar power panel. Over time, water can seep through the gap and into the motor, causing it to seize.
If you take one minute during installation to coat the gap between the solar panel, insert and the outer housing with a silicone sealant, it will keep the motor safe from rust or corrosion and extend its lifespan.
Final Thoughts
A new RV plumbing vent can make a world of difference in how comfortable and safe RV living can be. Why suffer from bad odors or poorly draining pipes when an upgrade to any of the best RV plumbing vent cap replacements above will immediately fix the issue?
I hope this article encourages you to inspect your RV roof vents and change out the ones that show wear and tear or aren’t controlling waste tank odors properly.
The best RV plumbing roof vent will keep your camper smelling fresh and running smoothly so you can focus your attention on more enjoyable camping experiences instead!


"Man cannot discover new oceans unless he has the courage to lose sight of the shore."
-- Andre Gide


