
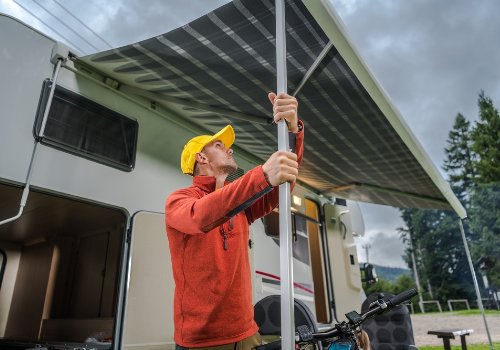
If you own an RV, eventually, you’ll need to replace the awning fabric due to damage from storms, falling objects, campfire embers, or wear from the sun, weather, or age.
While you can hire a professional RV service company to replace your awning fabric, you can save money and time by performing this task yourself.
To teach you how to safely and correctly replace the awning material on your recreational vehicle, I put all the steps for both power and manual awnings right here.
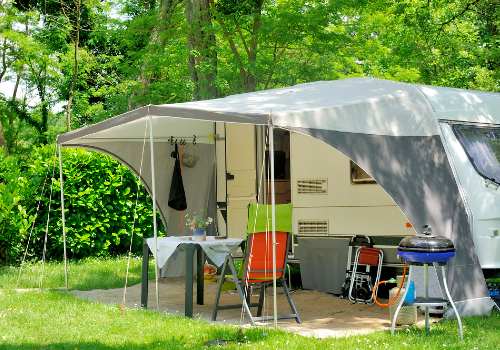
RVers rely on the awning to keep their camper cooler and protect the patio area from the sun and rain, so learn how to install new fabric so you can continue to camp in comfort!
Steps to Replace Your Manual RV Awning Fabric
Before we get into the steps of changing out old or damaged awning material, gather these tools:
- Power drill with appropriate bits
- Vice grips
- Screwdrivers – flat and phillips
- Long nail to hold spring
- Measuring tape
- Razor knife
- Marker
- Exterior caulk
- Tall step stool or ladder
- May also need a rivet gun, rivets, screen spline, and roller tool
While I’ve changed out my RV’s awning fabric solo, I highly suggest you have one or two more pairs of hands available to help you with this project. It isn’t easy to hold up the awning tube and slide the material into the track evenly with only one person.
Step 1. Open the Awning Fully
Open the awning as usual by flipping the lever to the “open” position and pulling the draw strap until the fabric stretches out.
Secure the stabilizing arms and lock them into place. Leave the legs attached to the brackets on your recreational vehicle.
Step 2. Lock the Awning Roller Springs In Place
Manual awnings use a tightly wound spring mechanism that fits into the roller arm so the material retracts correctly.
You must lock this spring so you can prevent it from rolling while you remove and replace the awning canopy fabric.
RV manual awning caps will have a hole made to insert a nail or rigid metal cotter pin to lock the spring in place. Refer to your owner’s manual to find the hole locations for your brand of awning, or look up the information for Dometic A&E RV awnings online.
Step 3. Clamp the Awning Roller Shaft
Clamp the vice grips onto the thin shaft of the roller tube on the side with the open and close lever. This shaft is the small rod that protrudes from the roller and slides into the awning arm.
Double-check that your awning lever is still in the “open” position, and firmly attach the vice grips to the small area between the end of the roller and the arm bracket.
The vice grips allow you to hold the rod and keep it from spinning out of control once you start to remove tension from the spring.
WARNING: Be aware that there will be a lot of pressure on the vice grips from the spring, making it want to turn, so hold it firmly.
Step 4. Remove the Roller from the Arm Brackets
To remove the roller from the arm bracket, you’ll need to take your drill and appropriate drill bit and unscrew the bolt at the top of the arms.
Have one person hold the vice grips in position.
Once the bolt is out, slide the top portion of the bracket up and out of the arm. Some awning models have a bracket that remains connected to the roller shaft, while others will allow the shaft to slide out.
No matter which type you encounter, ensure someone holds on to the vice grips and doesn’t let the shaft quickly unwind.
It’s handy to have two stools or sawhorses ready to hold the loose roller off the ground to make the next step easier to manage.
Step 5. Release the Tension from the Awning Spring
The person holding the vice grips needs to rotate the roller shaft slightly forward so you can flip the roller lever to the “close” position.
Then the person holding the vice grips needs to unwind the shaft to release the tension carefully.
When unwinding the spring, count every rotation until the pressure is gone. You’ll need to rewind the spring after attaching the new awning material using the same number of rotations so it will close tightly.
Step 6. Remove Roller End Caps and Springs
Take a marker and draw across part of the roller and the end caps so that when you reattach the parts later, you can line them up quickly.
Use the drill to remove the small screws around the perimeter of the cap and pull them off and slide out the spring mechanism.
NOTE: Some RVs have rivets holding in the end caps. If this is the case for your awning, you’ll need to drill out the rivets to detach the caps and then have small screws (self-tapping is best) to reattach them or have new rivets and a rivet gun tool on hand.
Step 7. Remove One Upper Arm Bracket and Fabric Set Screws
Get on your ladder or work from the RV roof (the ladder is easier) and unscrew the bracket on the right-hand side when facing the RV that holds the upper portion of the arm to the camper. This bracket covers the end of the upper awning track and is held in place by two or more long screws.
Once you pull the bracket free and remove the arm, you’ll need to look over a few inches on the track to the end of the awning material and remove the small set screw that keeps the fabric from sliding. There may also be a set screw on the other side of the fabric edge that will need removal.
Step 8. Slide Out Old Awning Fabric from the Tracks
This step is surprisingly simple, as the top and bottom of the awning material have a corded seam that will slip out of the rounded portion of the tracks.
I find it much easier to use a razor knife at this stage and cut the fabric just above the roller bar so it’s in two pieces, which allows you to remove the material from the tracks separately.
Have one person working from the ladder or roof pulling the material out from the upper track while another person slides the fabric out from the roller.
TIP: Before pulling out the fabric, use the marker to note where the fabric ends were sitting on the upper track and roller, so you have a reference for reinstallation.
How to Replace RV Slide Out Topper Awning Fabric (Video)
Step 9. Slide New Awning Fabric into the Tracks
Install the new awning fabric with the flapped or scalloped edge at the bottom roller and the plain edge at the top.
Work as a team to slide the poly cord seam into the track on the RV to the marks you made previously. The key to a smooth rolling motion is to evenly space the fabric between the two upper arm brackets and the brackets at the end of the roller bar.
Now, you can have a person hold the roller bar off to the side and have another person insert the bottom corded portions of the awning into the lower tracks. Have the first person slowly walk the roller bar toward the person feeding the material until it’s in place.
HINT: Most roller bars will have two tracks, but not all awning replacements will have two pre-corded seams to slip into them. If you have only one corded seam, use the track closest to the RV for the initial insertion.
Once the fabric is in place, you want to use a thick screening spline and roller tool to make the secondary connection.
First, run the roller tool over the fabric on top of the groove to push the material inside. Next, lay the spline on top and push that down firmly with the roller tool.
The spline is rubber, so try not to stretch it as you push it into the track so it won’t shrink and pop out later. Once the spline is in place, you can trim off any excess at the ends of the roller tube.
Some RV awning replacements will come with the spline you need, while others will require you to pick it up at a hardware or home improvement store.
Step 10. Reattach Arm Bracket and Set Screw
Now that the fabric is in, replace the set screws to the upper fabric so it can’t slide out of position, and reinstall the bracket that holds the arm to the camper.
Cover the threads of the bracket screws with a good dollop of weatherproof caulk before insertion to prevent any leaks.
Step 11. Reinstall Roller End Caps and Springs
Using your marker lines as a guide, replace the spring and end cap on the right-hand side of the roller.
Grab the bracket with the vice grips and spin the rod the same amount of rotations it took to unwind it originally. Most RVs will need around 15 rotations for good spring-back of the awning.
Once you have spun the spring enough, flip the lever to the open or locked position so it won’t wind, and have another person slip the bracket back into the top end of the arm and reinsert the bolt.
Follow the same procedure with the other side, but take extra care to hold the vice grips tightly until the bracket is safely back into the arm and the bolt is in place.
Step 13. Test Awning Performance
Now that the new awning fabric is in place, test out the retraction by holding the strap and releasing the lever lock to the “close” position.
Use a bit of tension on the strap so the roller doesn’t retract and spin shut too quickly, allowing the awning to roll up. The fabric should roll onto the roller bar evenly, without any wrinkles, and remain snug to the top where it touches the RV.
Open and shut the awning a couple of times to ensure it’s working correctly.
If, for some reason, the awning isn’t retracting fully and snugly, you didn’t tension the springs enough. You’ll need to detach the upper arm bracket on both sides and add a few more rotations to tighten the spring rods more.
Steps to Replace Your Power RV Awning Fabric
Replacing fabric on power awnings is different from manual versions. Follow these steps to accomplish the task:
1. Open awning about 12 inches.
Want to Connect With a Community of Over 1,078 RV Enthusiasts?
2. Use several long zip ties put together to secure the upper portion of both arms to the bar that holds the roller so it can’t open further.
3. Remove the set screws on the upper RV rail to allow the fabric to slide from the track.
4. Remove the small screws from both sides that hold the roller end caps to the central rod.
5. Have a person on a ladder at each end of the roller tube. Hold the roller up and push outward on the arm to remove the tube from the upper arm bracket.
6. Lift the roller tube and slide the whole pipe and material from the track. Have a person to the right of the track to help catch and hold the tube as you move it over so all the fabric can slide free.
7. Choose either end of the roller tube and remove the end cap, then unroll the fabric and slide the material from the track.
8. Remove the set screws that hold the material in the track and slip the fabric out.
9. Find the valance end of the new awning material and insert the poly cord at that location into the roller tube track.
10. Center the fabric on the roller and reinsert the set screws to keep the material in place.
11. Wrap the fabric around the tube, making sure the material’s underside is upwards. Coordinate with a person at the other end to maintain the fabric tightly against the roller and ensure that the edges are kept straight.
13. Once the material is rolled up, with the good side of the fabric showing on the outside, reinstall the end cap.
14. Walk the entire roller to the right of the track, have helpers lift it, and, starting from the left of the tube, slide the loose end of the fabric with the poly cord into the upper channel that attaches to the RV.
15. Unroll the material enough to slide the ends of the roller tube bar into the arm head assembly and reinstall the small screws on both ends to hold it secure.
16. Remove the zip ties and run the awning in and out a couple of times to ensure the fabric is pulling and lined up correctly, then replace the set screws to hold the material in place in the upper track.
You can watch some manual awning fabric replacement videos to get a better understanding of the process.
How to Replace RV Awning Fabric (Video)
Awning Replacement Fabric – Which Material is Best?
Most awning replacement fabrics are vinyl, which is the least expensive to purchase and provides an easy-to-clean waterproof surface, making it the overall best choice.
The downside to vinyl is that it will fade and start to crack or peel after 3-5 years and need replacement.
Acrylic awning fabric is woven and very durable. The weave allows air to circulate through the material yet remains an excellent barrier against rain and sun.
The only real negative to acrylic replacement awnings is they are much more expensive.
Canvas is the last material option and can be the least costly to purchase. Unfortunately, the canvas is only good in the rain if you treat the fabric with a waterproofing spray.
If you don’t spray the material, it can absorb moisture and get very heavy, which may damage your awning components.
Final Thoughts
RV awning replacement may seem like a difficult task, but if you follow the steps and take your time, anyone can DIY the job with the assistance of a couple of friends.
Once you measure your old awning, you can order a replacement directly from RV supply stores or online and have your new awning in place in less than two hours.
Why pay for an expensive service call to have an RV tech replace your awning? Instead, use the guide above to install a new power or manual awning fabric, then sit underneath in the shade and enjoy the fruits of your labor!


"Man cannot discover new oceans unless he has the courage to lose sight of the shore."
-- Andre Gide


Your instructions are very easy to understand and I will try to follow it, hope it works. Thank you for sharing this helpful article.
Your instructions are indeed easy to follow. Thank you!