
Owners can DIY many RV maintenance tasks, including replacing their RV water pump. The RV water pump pulls water from your freshwater holding tank and pushes it to your shower, toilet, and sinks. Without the pump, you won’t have any running water when you aren’t connected to a city water supply, which means boondocking RV trips will be much less enjoyable.
When your RV water pump goes bad, you don’t need to drive your recreational vehicle to a repair shop and pay a hefty sum for a repair if you’re handy with tools. A DIY RV water pump replacement isn’t difficult when you know what steps to follow to do it safely and correctly.
To learn all the steps to replacing an RV water pump, you only need to follow the guide below. Then, in no time, you’ll have your RV water system up and running again so you can travel stress-free!
How to Tell You Need a New RV Water Pump

- Positive Displacement 3 Chamber Diaphragm Pump
- Check Valve: (1-Way Operation) Prevents Reverse Flow
- CAM: 3.5 Degree
- Motor: Permanent Magnet, P/N 11-173-01, Thermally Protected
- Voltage: 12 VDC Nominal
RV water pumps are very hearty, which means they should last for quite a few years before needing replacement.
The biggest reason you will need to install a new RV water pump is that the motor burns out. This issue is common with older units or ones in constant use, such as people who love boondocking instead of staying in RV parks.
Another reason you’ll know it’s time to replace the RV water pump is when it forms a leak from dried-out gaskets or from a faulty winterization process that may crack internal components.
If you turn on your water pump and nothing comes out of your faucets or shower, the pump motor is dead.
If you turn on the water pump and a puddle forms on the RV floor, there is a leak within the pump components or with the fittings where the plumbing lines attach to the unit.
Suppose you use your RV often without connection to a city water supply. In that case, an indication of a failing pump may be that it cycles erratically, runs loudly, or makes strange noises and does not keep the water pressure consistent.
How Much Is a New RV Water Pump?

- PREMIUM PRESSURE - Flow Max averages 50 PSI with an average of over 3.0 gallons per minute water flow
- DURABILITY - Designed with a heavy-duty, corrosion-resistant motor
- COMPATIBILITY - Choose from a 12V or 115V configuration depending on your needs
- BLOCKS DEBRIS-The included Flow Max screen prevents debris from entering the pump, helping to keep water clean
- REDUCES DAMAGE- The Flow Max water pump can run dry without incurring damage for worry-free operation
The great news about replacing a broken RV water pump is that a replacement RV water pump isn’t going to blow your budget.
Most RV water pump replacements cost under $100, with the majority of them in the $65-$80 range.
You can expect a plumber or RV technician to charge anywhere from $100-$350 to install a replacement pump in your camper, which is why so many RVers prefer to DIY the project themselves and put that money to better use.
What Replacement RV Water Pump Features Are Important?
A water pump for recreational vehicles will have a GPM (gallons per minute) rating on the label, which indicates how fast it will pump water to your faucets, toilet, or shower.
Most RVs will have a pump that pushes around three gallons per minute, which is sufficient for small to mid-size travel trailers, fifth wheels, or motorhomes. Large RVs with multiple faucets and toilets should buy a replacement water pump with a five-gallon or higher GPM rating.
Another feature to look for in your replacement pump is the PSI (pressure per square inch) rating, which should fall in the 40-55 range to provide a strong stream of water to wash dishes or for showering.
Lastly, make sure your RV power supply can handle the wattage required to run the new pump.
Supplies and Tools to Replace an RV Water Pump

- Created with a unique one-piece diaphragm and internal by-pass, this pump is durable and reliable for all plumbing systems….
- The 4008 Revolution fresh water automatic demand pump is super quiet, thermally protected, and can run dry without damage. With…
- With the built-in check valve, backflow is prevented so that you can make sure you’re getting all of the water you want to the…
- Please Note: E65 and A65 is the Same Pump. Pump Listed Does NOT Come in Retail Package
Here’s a list of what you’ll need to replace the water pump in your camper:
- New RV water pump
- Drill with appropriate bits
- Screwdriver
- Crescent wrench and channel locks
- Wire stripper and crimper tool
- Wire cutters
- Spade connectors or Butt connectors
- Electrical tape
- Shallow pan to catch water
- Towels or rags
- Pipe thread tape
- New water pump filter if necessary
Luckily, most RVers will already have many of these tools and supplies in their general maintenance toolbox, saving time and money.
Once you have everything ready, follow the steps below to DIY your RV water pump replacement.
Step-By-Step Guide to RV Water Pump Replacement
While there are quite a few steps to changing out your RV water pump, none of them are overly technical or difficult to do. Anyone with basic handy-person skills should be able to finish the project in an hour or two.
Step by Step RV Water Pump and Check Valve Replacement (Video)
Step 1. Turn Off Power to the Water Pump and City Water Supply
If your RV is connected to the city water supply, you’ll need to shut off the valve or disconnect the hose completely from the spigot or your camper intake port.
Removing the hose will eliminate any chance of anyone accidentally turning on the water when you’re in the middle of swapping out the pumps.
Also, ensure the water pump is in the off position, and as an extra precaution, turn off the RV breaker that controls the pump or pull the fuse.
Step 2. Open a Faucet in the RV
Turn on some faucets inside your RV to relieve the water pressure and drain the water from the plumbing lines. Once the water stops flowing, you can begin work on the pump.
Step 3. Disconnect the RV Water Pump from the Latching Controller if Necessary
Some recreational vehicles have a latching controller next to the water pump. The controller looks like a box with multiple wires. Skip this step if you do not see this component by your RV water pump.
The latching controller lets RV guests turn on the water pump from various locations within the camper, such as from the kitchen or bathroom, aside from the main control panel.
Before you disconnect the latching controller, take a picture so you can reconnect the wiring in the proper order.
To disconnect the latching controller, you want to start with the ground wire. This wire is often black, but not always, so you may need to look up your model of controller online to find the schematic.
Next, you’ll want to remove the red wire, or the positive lead, that connects the controller to the water pump. In some cases, this red wire also connects to a yellow wire.
Using your wire cutters, snip off the yellow wire near the pump. You will reuse this wire after installing the new pump.
Step 4. Remove Plumbing Inlet and Outlet Lines from the Pump
Before you remove the plumbing lines that run in and out of the pump, you’ll want to either lift a floor-mount pump enough to slip the pan underneath to catch water or place a towel next to it to absorb any residual water left in the pipes. Wall-mount pumps are much easier to get a container under to catch drips.
Sometimes the pump is secured to the RV floor using an extra bracket or strapping, aside from the standard mount with four screws. Unscrew everything to free the water pump so you can lift it.
The connections that hold the water lines to the inlet and outlet ports on the pump screw on. Try to unscrew them from each side using only your hands.
If the fitting is too tight, you can use a pair of pliers to get a better grip, but be careful not to squeeze so hard it bends or cracks the connector. If you damage the connector, you’ll need to replace the whole part, delaying getting the new pump in place.
Once you unscrew the plumbing lines from both sides of the pump, let the water drain into the pan or towel or lift the ends to stop any dripping until you reattach the lines to the new pump.
Remove the old pump from the area.
Step 5. Remove and Clean the Water Pump Inlet Filter
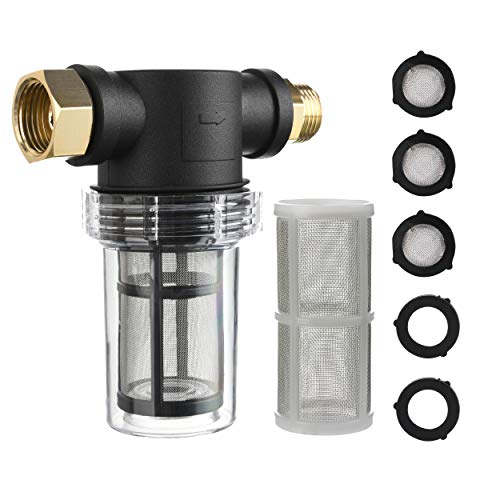
- Hose water filter kit includes inline hose filter (40 mesh screen), 100 mesh screen, 2 hose washers and 3 filter washers.
- Water hose inline filter connects to pressure washer inlet, standard garden hose and home water spigot.
- It is essential for household to filter sediment or debris coming from spigot into garden hose or pressure washer. As pressure…
- As garden hose filter, it can protect pressure washer parts avoiding blocked or damaged by sands, debris.
- It has 3/4 inch GHT male and female thread. Max working for garden hose is 80 PSI.
When you remove the hoses from the old water pump, there should be a filter where the hose connects to the inlet port.
You should be able to reuse this filter when you install the new pump, so now is the time to clean out any debris in the mesh.
To remove the filter from the pump, use your hands or a wrench to unscrew it. Then, open up the filter by twisting it apart.
An old toothbrush is ideal for clearing away any particles clogging the filter. If the filter is falling apart or you can’t unclog it, you’ll also need to replace this part.
How to Clean Your Water Pump Filter (Video)
Step 6. Insert the New RV Water Pump and Filter
You can now place your new water pump in place. If your pump has a filter, reinstall the new or clean one now.
Make sure you follow the arrow guides that show you which direction the water needs to flow. Both the pump and the filter will have these arrows imprinted on the units.
Both arrows must be facing the same direction so the inlet water hose enters the filter that points to the matching directional arrow on the water pump intake.
The new water pump will have a plastic or rubber cap over the threads on the inlet and outlet ports. Pull the inlet cap off, and screw on the new filter if you need one.
Step 7. Secure New RV Water Pump to Camper Floor or Wall
You now want to mount the new pump in the same location and orientation as the old pump. If you replace the unit with an exact match, you can reuse the screw holes already in place.
Some RV water pumps attach to the floor, while others hang from a wall under a cabinet or inside an exterior storage bay. Attach the four screws and tug at the pump to see that it doesn’t move.
If there were any secondary braces on the water pump, reattach them now.
Step 8. Reattach Inlet and Outlet Hoses to New RV Water Pump
Want to Connect With a Community of Over 1,078 RV Enthusiasts?
After the water pump filter is snug, reattach the inlet water hose you removed earlier by screwing it onto the inlet port threads either directly on the filter or the pump. Hand-tighten this connection, as over-tightening may strip the threads.
Some models of water pumps indicate using pipe thread tape first to ensure a leak-proof connection.
Reattach the plumbing line on the outlet side of the pump by first removing the cap over the port threads and screwing on the existing hose.
Step 9. Reattach Wires Running to Latching Controller
The new RV water pump will have a red and a black or sometimes blue wire.
The darker wire is the ground wire, for which you’ll need to use your tool to strip the wire end and crimp it on a spade connector.
Now is a good time to reference the photo or drawing of the wiring you took earlier so you know you are doing this step correctly.
Strip the old yellow wire you snipped off earlier and the end of the red wire from the new pump. Twist these two wire ends together and crimp them into a spade connector.
Give each spade connector a gentle pull to ensure they are crimped on tight and the wires will not fall out or wiggle and cause an electrical fault.
Lastly, insert the spade connectors into their corresponding spots in the latching controller box.
Step 10. Reattach the Pump and Latching Controller or Power Wires
You can now clip in the positive leads (red/yellow combination) to the latching controller in the correct portal, as well as plug the black or ground wire into its designated portal.
If your RV doesn’t use a latching controller, you can connect the power lines using butt connectors.
Step 11. Return Power and Water to the RV Water Pump
You can now replace the fuse or turn on the breaker for the water pump so it has the power to operate.
Now, reattach the water hose and open the city spigot to the RV or ensure the RV freshwater holding tank is full.
Now turn on the main switch for your water pump and open a faucet until water flows without sputtering. It may take a short time to clear all the air out of the plumbing lines, but you can turn off the faucet once it stops.
Leave the water pump on to allow the plumbing lines to pressurize so that you can check for leaks.
Step 12. Inspect the RV Water Pump and Connections for Leaks
Look at the new water pump and closely inspect the connections at the intake and outlet ports and around the filter if you have one.
If you spot any leaks, use your hands or pliers to tighten up the fittings until it stops.
Once you’re certain there are no leaks, you can turn off the water pump if you no longer need it.
RV Plumbing Leak Diagnosis and Repair (Video)
Final Thoughts
This guide shows that RV water pump replacement isn’t complicated when you know what steps to follow.
The more you know about your RV water pump components and how they operate, the more you’ll gain confidence in tackling other DIY RV repairs.
Being able to save money by fixing broken RV components yourself allows you to spend it on more enjoyable camping pursuits, so follow the steps above if you need a new RV water pump!


"Man cannot discover new oceans unless he has the courage to lose sight of the shore."
-- Andre Gide


