
RVing full-time requires a recreational vehicle that is functional, efficient, and very comfortable for long-term, daily use.
To create a more welcoming RV environment, you can upgrade your camper to make the full-time lifestyle easier by using the ideas in this guide.
Inside, I detail the top upgrades full-time RVers find most helpful and why they will make your life on the road more enjoyable. Of course, these tips are also great for any RV enthusiast, so check them out and give some or all a try!
15 Best RV Upgrades that Make Full-Time Life Easier

Upgrading your motorhome, fifth wheel, or travel trailer to make it more user-friendly doesn’t always have to cost a fortune. Many of the ideas below can be done on a budget, especially if you’re handy at DIY projects, but some will require professional help or products to make the upgrade a success.
1. Adding Vent Covers to RV Roof
For around $40 per vent, you can add covers over the top that will protect the flimsy plastic lids from damage and UV exposure and allow you to keep the roof vents open during rain.
RV roof vent covers are an easy DIY installation project and will transform the comfort level inside your camper by letting in fresh air without worry of water leaks.
The cover also shades the roof vent so excessive heat doesn’t enter your RV.
The MaxxAir RV Vent Cover is one example of an easy-to-remove cover but is compatible with manual or power vents.
2. Adjusting and Installing Shelving
Many RVs come with plenty of cabinets, closets, and storage compartments. Still, their interior layout isn’t very functional as it leaves a lot of wasted space above or below shelves or clothes rods.
By moving shelves up or down and adding in more where necessary, you can gain much more space to slide in bins, food, clothing, or camping supplies.
You can buy inexpensive brackets and laminate shelves at home improvement stores or make custom-fit plywood shelves and stain them to match your cabinetry.
Adding shelving, especially in areas where space goes to waste, such as the bottom of a closet, will transform your RV storage efficiency and capacity.
3. Switching to an On-Demand RV Water Heater
Upgrading your standard six or ten-gallon RV water heater to an on-demand RV water heater will provide all the hot water you need without the annoyance of a wait time between showers, cleaning dishes, or washing clothes.
Being able to forget about the three-minute RV wash-up and enjoy a long hot shower is one upgrade any camping fan will appreciate.
RV on-demand water heaters should fit into the existing opening in your camper, making the installation much more manageable and is doable as a DIY project if you can handle some simple electrical wiring.
If you camp at higher altitudes, there may be issues with the proper function of the water heater, so please research the brand and model of any RV on-demand water heater before you purchase to ensure it will work correctly.
Once RVers with an on-demand water heater learn how to work the new unit, they all rave about the luxury of having hot water whenever they want.
4. Installing a Driver’s Side Awning
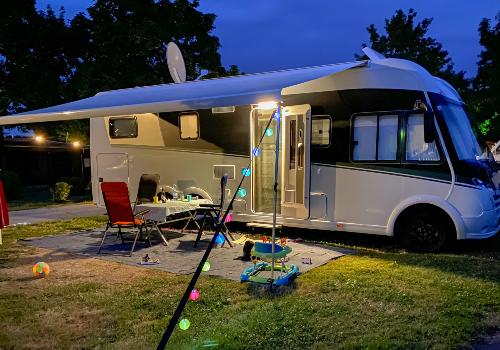
Full-time RVers often sit in one location for a month or more, which means one side of your RV may have exposure to the sun that will raise interior temperatures or cause too much glare when trying to relax inside.
Adding an awning on the driver’s side of your RV can dramatically increase comfort inside and outside your camper.
You can purchase the materials to DIY individual awnings over each window or have them professionally made. You can also install a standard RV power or manual awning, but depending on where you camp, it may infringe on the next campsite, and you’ll only be able to open it partway.
I made a removable awning for my RV driver’s side and can now sit on my couch and not cook during the day when we park in an east/west direction. I bought some outdoor canvas fabric, poly cord, awning track, and some boating plates and brackets online and picked up some galvanized 1″ conduit to run along with a slot I sewed into the bottom edge and for creating three short support arms.
I sewed the awning 48″ wide and as long as the box length of the RV. Next, I cut the conduit into five-foot sections (so they could fit under my bed when not in use) and used couplers to hold it together.
Once I permanently added the track and bracket plates to the RV, I could slip the awning into the groove, connect and run the conduit into the bottom slot, and add the short arms to hold the bottom of the awning away from the camper’s side.
The whole thing cost me less than $200 and only takes minutes to install and remove, but the value in the comfort level inside my RV on hot, sunny days is priceless.
5. Replacing Factory Furniture with Residential Versions

Most people who camp often find the factory-installed RV furniture uncomfortable or an inefficient use of space.
A large booth dinette may seem great for eating, games, or work when you first buy your camper, but if it doesn’t work well for any of the above tasks, it quickly frustrates you.
Don’t be afraid to remove any furniture inside your RV that doesn’t work for your needs. A free-standing table and chairs give you the ability to adjust the distance so all sizes of bodies can sit comfortably.
Taking out a bulky and heavy jack-knife sofa or long couch and replacing it with two recliners or a loveseat may be much more functional and give you room for end tables with storage.
Changing a standard RV toilet for a high-rise version will save your knees, and swapping out a deep entertainment center for a slim bookshelf will let you store and display more items and free up floor space.
Please take a good look around your RV for its hidden potential, as small changes with the furniture can dramatically increase ease of use.
6. Switch Double Basin Sink to Single Basin
Many RVs come with a double-basin sink that makes it difficult to fit larger cookware or dishes.
Two small sink basins are inefficient for all types of kitchen tasks while camping, so swapping it out for one single large basin can be a stress-saver.
Depending on your RV sink and kitchen design, switching the sink and rerouting the plumbing and drain lines may take some effort, but you’ll be happy you did.
7. Upgrade Exterior Slide and Awning Material
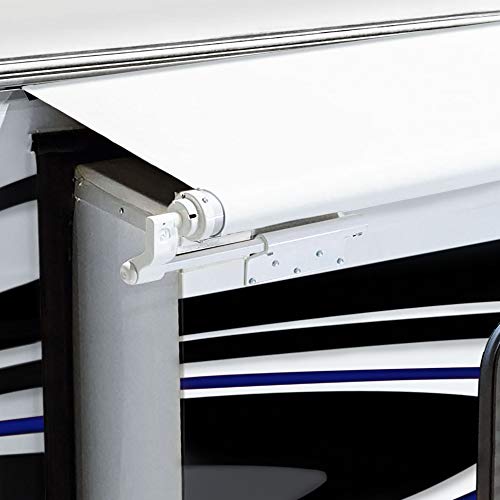
- Our largest replacement slide topper fabric can be easily cut down to fit slide-out rooms ranging from 160” to 200” and it can…
- With a tensile strength of 140 PSI, you can be sure that it’ll stand up to the test of time. Once trimmed to properly expand…
- This slide-out awning is available in black or white, classic colors that fit any exterior color scheme. Easily cleaned with our…
It’s an unfortunate reality that most RV awning and slide topper materials aren’t of the best quality, and it doesn’t take long for them to discolor, crack, or tear.
One mistake leaving your awning out and a storm or high winds coming rolling through can decimate even brand new awning material.
Not only do worn or torn awnings look bad, but it leaves your RV exposed to rain, and excessive heat from the sun, which leads to more damage to your camper.
When it’s time to replace the material on your awning or slide toppers, don’t run to buy a factory replacement. While the cost may look appealing, they too will fail quickly.
The solution is to upgrade your exterior slide toppers and awning material with an industrial-grade fabric that can withstand the elements for much longer than standard RV awning replacements.
You can find heavy-weight fabric from companies like Shade Pro or SunWave Awning that full-time RVers give great reviews to.
You can either measure your awnings and have custom-fit replacements for your RV factory sewn or hire a local sewing professional to turn fabric by the yard into the awnings you require.
8. Changing the Mattress on the Bed
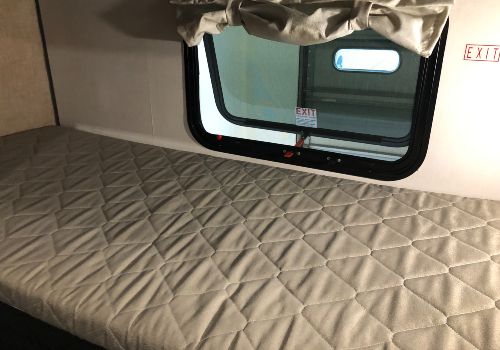
RV mattresses are another typical problem full-timers face, as they tend to be either too thin, too hard, or too small.
Spending night after night on an uncomfortable RV mattress isn’t as easy to take as you would for a weekend camping trip.
Even when a high-end RV manufacturer boasts of a superior-quality mattress, it doesn’t take many sleepless nights tossing and turning to get you thinking about buying a replacement mattress.
Avoid any discomfort when it’s time for bed by immediately purchasing a residential mattress to fit your RV bed. The bed platform can hold a mattress a bit wider or longer to better suit your frame in many instances.
When you install a mattress with the correct firmness and thickness for your needs, you’ll sleep so much better, especially when you need proper rest after spending hours on the road during travel days.
Check out highly-rated companies such as Zinus for an inner-spring style or Linenspa for a memory-foam product.
9. Switching Under Booth Storage Access to Drawers
Many RVs with booth dinettes offer lots of storage space underneath the seat.
Unfortunately, when you can only access your gear by removing cushions, pulling up the tops of the seats, and then contorting your body around the table to reach what you want, you’ll start avoiding this compartment because it’s such a hassle.
The best way to keep using this valuable storage space is to revamp it into long drawers that slide out for easy access to your RVing supplies.
You can find DIY plans to alter your booth seats into drawers, or you can hire a local handyperson to make the upgrade. Watch this booth upgrade video for more details on what this project entails.
Camper Booth Dinette Drawer Mod (Video)
10. Set Up a Mobile Internet System
Full-time RVers know that you can never rely on free campground internet to work fast or consistently enough to complete any computer work without getting a headache.
Having your own wireless internet connection is a must, but using your cellular phone as a hotspot can create problems.
Want to Connect With a Community of Over 1,078 RV Enthusiasts?
When a work deadline looms, or you want to kick back and do some gaming, it pays to invest in a personal wireless internet hotspot for fast speeds and private browsing.
Verizon Jetpacks are a popular choice for a monthly fee option, as the coverage area is the most complete across the US, but other brands, such as RoamWiFi offer a pay-as-you-go package that can be just as reliable.
11. Add Tinting to Windows and Motorhome Cab Windshield
If your RV doesn’t have tinted windows, it pays to have them done to increase privacy and temperature control inside your recreational vehicle.
Many motorhome owners forget to tint the cab windows, especially if you have a Class A motorcoach. Running a darker tint over the top portion of the windows will significantly reduce glare when driving during the sunrise and sunset hours and make all your RV journeys much more enjoyable.
12. Install an RV Water Softener and Filter System
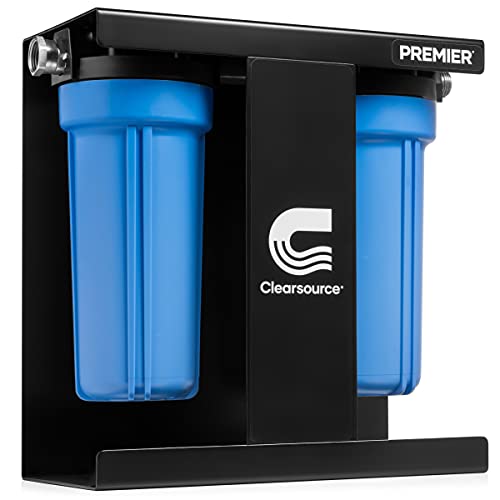
- INDUSTRY-LEADING 0.2 MICRON PROTECTION. Our two-stage filter system, with best-in-class 0.2-micron protection against contaminants…
- CLEANER, SAFER WATER THAN OTHER SYSTEMS. Tighter filter pores trap more contaminants. We lead the industry in the size and quality…
- HOSPITAL-GRADE 0.2-MICRON FILTER CAPTURES CONTAMINANTS OTHER SYSTEMS MISS. Unlike the filters in other systems, our 0.2 micron…
- IMPROVES TASTE & SMELL. Paired with our first stage coconut shell carbon block filter, the Clearsource Premier also improves taste…
- BULLET-PROOF CONSTRUCTION. We engineered our Clearsource Premier system from the ground up just for the RVer. We invented its…
You never know what water situation you’ll run into when you travel full-time in your RV, so having a high-quality filtering system will ensure you always have safe drinking and cooking water.
Hard water is another issue that can quickly cause mineral build-up around your sink and shower fixtures and can corrode the interior of your RV water heater. Installing a portable water softener will fix this issue and keep your RV and appliances looking and working their best.
Hooking up these systems to your RV is simple, with easy hose-extension modifications to connect the incoming water source through the softener and filters and into your RV to feed to the sinks, shower, and toilet.
The cost to install both components is between $500-$600 and is worth every cent for clean, fresh soft water.
13. Install an RV Tire Monitoring System

- Auto Solar Charge – Tymate Tire Pressure Monitoring System M12-3 Black is automatic solar charging, using higher quality and more…
- Five Types Of Alarms And User-set Alarm Values – Tymate Tire Pressure Monitoring System M12-3(4E) Black is equipped with…
- Auto Backlight & Sleep & Awake Mode – Tymate Tire Pressure Monitoring System M12-3 Black’s auto-adjustable backlight can clearly…
- Low Power Consumption and Long Working-life Sensor – Tymate Tire Pressure Monitoring System M12-3 Black equipped with 4 advanced…
- Tire Position Exchange – Tymate Tire Pressure Monitoring System M12-3 Black provides the function of changing the tire position….
A reliable tire monitoring system for RVs can ease the stress of constantly checking your RV tires manually for safe PSI and any uneven wear that can generate excessive heat during long drives.
By hooking up the sensors to the main unit, you can watch the display set in your motorhome or tow vehicle cockpit for alerts to dangerous tire conditions so you can pull over and get it fixed before a blow-out or accident occurs.
You can buy a kit for as many tires are on your camper for complete coverage at a glance.
14. Install RV Solar Power System

- Perfect kit for having an off-grid 12 volt battery system. 3000 Watt Inverter provides plenty of AC power to run your household…
- Solar charging will provide about 2880 Watt Hours (Wh) or 240 Amp hours of charge per day (depends on sunlight availability)
- Complete kit includes: 6pcs 100 Watt Monocrystalline Solar Panel, 4pcs 200Ah Gel(Maintenance Free) Deep Cycle Battery,3000W 3000…
- Bundle and save! Purchase all the components together and save time and money!
- California, USA based company in 11+ years solar industry supplies technical support, customer service and warranty; Reliable &…
Most full-time RVers spend days off-grid, either on purpose to get away from it all or when campground or city power goes out due to inclement weather or other issues.
Hauling around a heavy and bulky generator isn’t always the best, or eco-friendly, answer to having enough power to run some lights or charge up a cell phone when electricity isn’t available, but hooking up a small solar power system can be.
Depending on your power draw needs, you can get a single solar panel, inverter, and a charge controller to keep your house battery full. Or, you can choose to cover your entire RV roof covered in solar panels and a bank of batteries to store the energy until you need it to keep the fridge running or use other appliances.
Upgrading your camper with an RV solar power kit will give you more traveling freedom and is an excellent modification for the full-time RV lifestyle.
Luckily, many newer recreational vehicles come pre-wired for solar hookup, making the install much faster.
15. Increasing RV Insulation
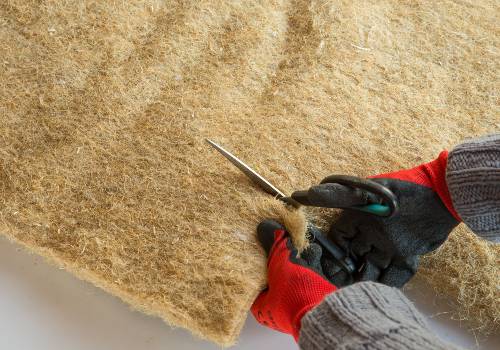
Unless you buy a four-season RV made for all climates, you’ll find the insulation inside your storage compartments and cabinets and on your undercarriage to be thin or entirely lacking.
The best way to tell where in your RV you can add insulation is to wait for a hot or cold day and feel the temperature in the back or undersides of your cabinets.
By stuffing gaps with batt insulation or cutting thin foam board insulation to fit over cold walls, you can stop drafts and heat or cooling loss, so your RV interior temperature remains more stable year-round.
Going a step further by insulating all your basement storage compartments and undercarriage will keep the floors warmer and also help your holding tanks and water lines from freezing during winter.
Insulating the RV undercarriage and storage compartments will also reduce road noise, making travel days more pleasant.
Final Thoughts
Big or little problems or annoyances in your RV will only keep growing if you don’t take the time to change the things you can.
Upgrading your RV for full-time living will make every day better by relieving stress and helping you use your camper more safely and efficiently.
I hope you consider some of the top upgrades full-timers make to their RV in the list above and turn your rig into one happy camper!
RV Upgrades for Full-Time RV Living (Video)

")


"Man cannot discover new oceans unless he has the courage to lose sight of the shore."
-- Andre Gide


")

I would love to see pictures or a video of your awning you made. The previous owner ripped mine off, but I would like to reconfigure and add another awning to the other side. Pictures or videos would be so helpful!