
Does your RV leak from the air conditioner every time it rains? A leaking RV air conditioner is more common than you think, and there are many ways to fix the problem before it causes expensive damage to your camper.
To help you prevent or stop your RV’s air conditioner from leaking when it rains, I put together this guide. Inside, I explain the reasons why your RV air conditioner may leak and detail all the ways to fix it once and for all.
When you know how to deal with air conditioner leaks inside your motorhome, travel trailer, or fifth wheel on rainy days, it won’t have to ruin your camping fun!
Top Reasons an RV Air Conditioner Leaks When It Rains

1. AC Not Mounted Correctly
Most RV air conditioning units have a premade framing hole in the roof, so there is ample support to hold the weight securely. In addition, 220-volt wiring runs through the framing and ends near the cut-out for easy connection once you install the air conditioner.
The camper air conditioner has two parts: the exterior portion that holds the compressor, condenser coils, evaporator coils, and drip pans, and the interior portion with the vents, air intake filter, and control panel.
The assembly includes a dense rubber gasket that sits directly on the roof around the air conditioner hole.
The upper unit sits on top of this, with four bolts coming down through the roof framing that you tighten to sandwich the two components together, with the gasket acting as a barrier to stop water and wind infiltration.
If the gasket isn’t seated correctly, is of poor quality, or the bolts aren’t tight enough, water can easily run underneath and drip into your RV when it rains.
For people who add an aftermarket air conditioner to their camper, the roof support may be lacking or too thin, so the standard attachment of the AC can’t occur, which again will lead to leaks during storms.
2. Road Vibrations or Direct Damage Move the AC
Never underestimate the power of mile after mile of road bumps and vibrations on all your RV appliances, including the air conditioning unit.
Nuts can work loose from the bolts, the roof-mount portion of the AC can wiggle out of place, and a low-hanging branch can smack the AC housing and push it slightly out of position.
It doesn’t take much to loosen the gasket’s seal around the base of the unit and allow water to drip into your camper.
3. Weather Exposure Causes RV Air Conditioner Parts to Fail
The top of your camper’s RV gets continual exposure to all the elements, from freezing snow to the scorching sun.
The rubber gasket will age out over time from the constant changes in temperature, becoming dry, brittle, and overly compressed, so it quits doing its job of keeping out water.
The shroud that covers your air conditioner is another component that feels the effects of the weather extremes. The plastic can crack or get a hole from backing into tree branches that you didn’t notice, letting rainwater flow directly into your unit and down into your RV’s interior.
4. General Roof Damage
Sometimes, damage from other portions of your roof will let water slip under the membrane, and it finds its way to the edges of your AC unit between the framing and drips from what appears to be the AC.
Some RV roofs have a slight convex curve, so the air conditioner sits above the sides, and water will naturally run away from the unit.
Most RV’s have a flat roof, which makes this migration of water toward the central AC unit much easier, primarily because, over time, the weight of the air conditioner causes the center of the roofline to sag. The sagging is often hard to see with the naked eye but is a common issue with older RVs.
Openings can occur at every seam, running light, vent, antenna, ladder, or other attachment on your RV roof and leak when it rains as water migrates toward the air conditioning unit underneath the roof membrane.
5. Clogged AC Drain Holes
Under the shroud on the roof, you will find one or two pans that collect condensation that collects on the coils as the unit runs. The pans typically have holes for excess water to drain out and off your RV roof.
If the drain holes in the pans or hose leading to the pans get a clog, the water will fill up and overflow the pan directly above the roof mount, allowing water to drip back into the camper through the AC’s vents or other components.
6. Dirty AC Evaporator Coils
Dirty evaporator coils are another reason your AC can leak, as they disrupt the natural drainage patterns of the unit and into the drip pans.
To locate the coils, you’ll need to go up on the camper roof and remove the shroud.
Some units also have a secondary cover inside that will expose the evaporator coils. The evaporator coils should be toward the front of the RV, while the condenser coils are at the back.
How to Fix a Leaky RV Air Conditioner
1. Tighten the RV Air Conditioner Mounting Bolts
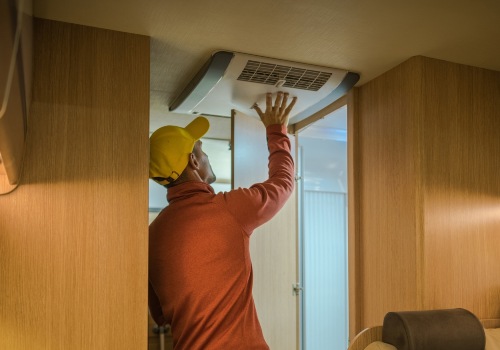
The first order of business is to inspect around all four sides of your AC’s gasket and see that it’s in good condition and has not slipped out of position.
You can do this from the roof by using a flashlight to look around the base of the unit. However, depending on your RV and air conditioner model, it may be difficult to get a good view of the entire gasket.
Road vibrations or a gasket shrinking from age can create a gap between the AC and the roof, allowing water to drip in.
If you feel the gasket is in good shape, you need to turn off all power to your motorhome or travel trailer and remove the inner cover of your air conditioner so you can access the mounting bolts.
Tighten up the bolts until they feel snug. You can then test out the fix by spraying a hose to simulate rainfall on the roof around the AC for fifteen minutes and see if you detect any leaks.
If you still have leaking problems, you’ll need to replace the air conditioner gasket.
2. Replace the RV Air Conditioner Gasket
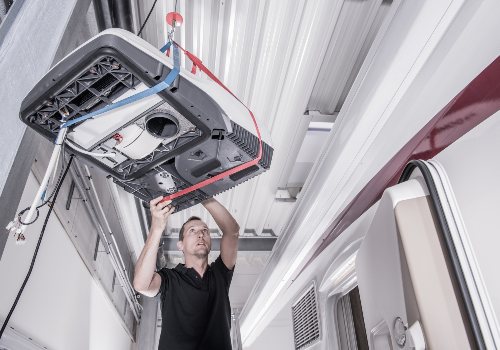
To replace the gasket on your RV’s air conditioner, you’ll need to order the part that fits your AC and then remove the unit from your camper.
Ensuring that the power to your camper is off, remove the interior cover and the nuts from the mounting bolts. Next, find the power connection and unplug it.
You’ll need assistance lifting the AC from the roof hole, so make sure you have a buddy there to help.
Once you lift out the AC, you’ll want to remove the old gasket and inspect all around the opening for wood rot or other damage that would allow water to penetrate.
Fix any damage you spot, install your new gasket around the roof opening, and set the AC back in place. Tighten the mounting bolts to create a good seal, and hopefully, your AC is now leak-proof.
EXPERT TIP: Don’t over-tighten the mounting bolts, as you need to leave a space between the bottom of the AC unit and the RV roof to allow condensation to drip from the collection pans. This gap is generally between 0.5- and 1-inch tall.
3. Replace Broken RV Air Conditioner Shroud
If your air conditioner roof shroud is cracked or has holes, you’ll want to order a replacement and install it.
While adding caulking over cracks may be a temporary fix, it will eventually fail, so replacement is the better option.
4. Fix Roof Damage and Sag
There are times when an AC leak is from water getting under the roof membrane in another location and, running underneath toward the AC unit, and dripping down inside your camper.
Do a thorough inspection for holes, cracks, or missing caulk at the seams and around any vents, ladder attachments, antennas, or solar panel mounts. Fix any leaks with quality, weather-resistant RV roofing sealant.
Dealing with roof sag is another critical aspect of fixing a leaking RV air conditioner. You can quickly check for sag by pulling a string tightly across the roof just in front and back of the AC, then again on both sides.
Want to Connect With a Community of Over 1,078 RV Enthusiasts?
Sag is easily noticeable using this trick and lets you see how much you need to lift the AC.
The best way to fix sag is to start by removing the AC from the mounting hole. Then, carefully raise the roof membrane so you can install a plywood base around the opening to lift the AC back into position.
A plywood ring just a bit thicker than the amount of sag you measured is what you’re trying to achieve.
For example, if your roof is sagging 1/2 inch, install a 3/4 plywood ring about six inches wide around the perimeter of the AC hole in the roof.
Lay back your roofing membrane over the top of the new wood. If you had to cut your membrane to install the wood, use a product like Eternabond to seal the material back together.
Once the roof is back together, install a new gasket and put the AC back into position. Now, the roofline is raised in this area, and water won’t be able to collect and leak into your RV.
5. Clogged AC Drain Holes
Plugged drain holes are pretty standard, especially for RV’s kept in outdoor storage.
To fix clogs, remove the roof shroud from your AC and inspect the drain holes where the water drips into the condenser pans, and also check the spots in the pan itself where it allows the water to run off onto the roof.
Clear away any debris, and that should do the trick.
6. Clean Dirty Evaporator Coils
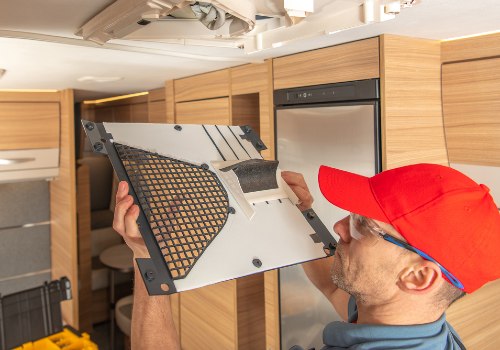
To clean away dirty material off your RV air conditioner evaporator coils, you’ll first remove the roof shroud and the sheet metal cover over the front of the AC.
You can vacuum away dry debris or use a household cleaner with a degreaser like Formula 409 and a soft brush (an old paintbrush works great) to clean the coils. While you’re up there, go ahead and clean the condenser coils on the rear of the AC unit to improve cooling performance.
Maintenance Tips to Stop RV Air Conditioner Leaks When It Rains
Like all your other RV components, you should make an effort to keep your RV air conditioner in top condition so you can avoid a costly replacement.
First, set up a schedule every two to three months to inspect the AC gasket and shroud, ensure mounting bolts are tight, and clean coils and drip holes.
Second, consider using an RV air conditioner cover when your motorhome or travel trailer is in storage. The cover will prevent weather damage to the shroud and keep out water and bugs from the vents.
Lastly, try to park your RV with the front end higher or lower than the AC, so any water that condenses from the unit doesn’t pool on a flat roof, giving the water a chance to seep in around the base.
Run the AC for a while and peek at the roof to see where the water is going. Use some RV leveling blocks to adjust the camper to allow the water to run off.
Final Thoughts
Rain during camping trips can often be a refreshing break from all the activity and give families a chance to gather inside to relax or play games. However, if your RV air conditioner leaks during rain, heading inside won’t be an enjoyable experience.
Stop mopping up water from your RV floor during rainstorms by following this guide that teaches you why your camper is leaking and what to do to prevent it.
By using the tips above, you can fix RV air conditioner leak issues once and for all and get back to camping fun!


"Man cannot discover new oceans unless he has the courage to lose sight of the shore."
-- Andre Gide


")
