
If your RV has slide-outs, chances are you’ll experience leaks if you don’t maintain the seals.
The problem is that many RVers don’t think to care for their slide-out gaskets, and they dry out, crack, shrink, or tear, allowing moisture to penetrate your camper’s interior.
To avoid issues with leaking slide-out seals, follow this guide to learn how to maintain all slide components and set up an inspection schedule to catch problems before they damage your RV.
What and Where Are the Slide Out Seals?
Slide-out seals are large gaskets made of rubber that go around the perimeter of the opening.
There are two gaskets on each slide: an inner one that helps stop air leaks and an outer seal that keeps water out.
The outer gasket looks more like a squeegee, and if not kept in good shape, the flap could fold over or crack and fall off, leading to water infiltration and frustration.
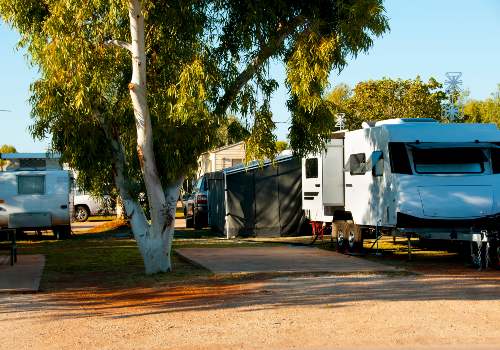
Most people with recreational vehicles with slides have a love/hate relationship with them.
People love the extra living space slide-outs provide inside the camper, and if leaks aren’t an issue, people are happy campers.
Unfortunately, those who have had issues with their RV slides, either from leaks or problems with the hardware moving correctly, can find them very aggravating and not worth it.
For this reason, keeping the rubber seals in good condition can alleviate the stress of air or water leaks and hardware malfunctions.
How To Tell If Slide-Out RV Seals Are Bad
When you extend your slide, it reveals the rubber seals so they are open to the elements.
If you don’t clean and condition both the inner and outer seals regularly, they will dry out. If you hear popping or creaking when you open and shut your slide-out, that is an indication the gasket is dry.
You may be able to prevent the need to install new RV slide-out seals if you treat them immediately, but it could be too late.
This expensive repair is why performing a seal inspection around all of your camper’s slides is so important.
A good rule to know if your RV slide-out seals are in decent shape is to look at the color. A gasket should look black and have a sheen, and the surface should be smooth, without any tiny fissures or cracks.
Some gaskets are white or grey, so look for yellowing or a lighter grey tone to indicate the rubber is dry or old.
If you have black seals that look dusty and a bit grey, that is most likely the powder that keeps them working correctly. Use a damp rag to remove any residual powder and wipe over the seal to inspect the rubber.
A dry, old seal will look very dull and gray. It may also have cracks or be folded or compressed in some areas.
A good tip is to have one person stand outside near the slide as another person extends it, which will allow you to hear any creaking or popping sounds better.
Lastly, look at the sides of your slide-out walls. Old seals often leave black marks or lines on the side when they adhere to the exterior wall when shut, which is especially true for RVs that have been unused for some time.
How Often Should You Condition Slide-Out Seals?
To maintain your RV slide-out seals so they remain functional longer, expect to condition them every two to three months. If you camp or store your camper in a very hot and dry climate, it would be best to condition them every six weeks.
If you store your RV most of the year, I suggest conditioning the seals at the bare minimum every six months.
You can purchase slide-out conditioners from camping stores or online retailers. One product that gets high marks from RV owners is Thetford Premium RV Slide-Out Rubber Seal Conditioner.
A quality slide-out conditioner should clean the rubber, condition the gasket, leave behind a water-repellent film, protect against UV rays, and leave a slight sheen to the surface.
Part of conditioning the seals includes using baby powder to coat the sliders, so they move smoothly, which I explain down below on how to service the inner and outer gaskets.
Steps to Service Slide-Out Seals

Inner seals on recreational vehicle slide-outs gain protection from the outer seals when the slide is shut, so they don’t get as dirty as external seals and are easier to clean.
You’ll need a ladder or step stool, and these supplies to service the inner slide-out gasket include:
- Can of RV seal conditioner
- Spray bottle full of water
- Dish soap
- Baby powder
- An old sock
- Some rags
Expect to spend about 5-10 minutes per slide to service the inner seal.
As you work, inspect all the seals either visually or with your fingers for damage. Any tears or cracks will require the replacement of the recreational vehicle’s slide-out gasket.
Step 1. Service the Interior Inner RV Slide-Out Seal
The inner seal needs attention from both inside and outside the RV.
It’s best to start from the inside of the RV. To do this, you’ll need to retract the slide fully.
Take your slide-out conditioner, baby powder, rags, and socks, and move to the interior of your camper.
Around each slide, you’ll find the seal hidden behind the wood trim. You can feel the rubber if you run your fingers behind the sides and top of the perimeter of the opening.
If you have easy access, you can spray your conditioner directly onto the seals per the manufacturer’s instructions.
If you worry you’ll spray the conditioner on your furniture, you can apply it to a rag and wipe it onto the seal.
Ensure you do a thorough job up both sides and across the top of the rubber gasket.
Give the seals a few minutes to dry. If they still feel damp, you can run over the rubber with a dry rag to pick up any excess.
To finish the inner seal servicing, you’ll want to add a couple of inches of baby powder into the sock and tie off the top. Squeeze and rub the sock until the baby powder comes through the fabric, and then run the sock over the rubber.
The powder will prevent the seals from sticking to the RV when shut and stop the annoying popping sounds when you open the slide.
Step 2. Clean the RV Slide-Out Side Panels
Dirt or sap on the exterior slider side panels can interfere with the smooth operation of the unit.
Open the slide-out fully and use a rag dipped in water and dish soap to clean off any debris from the side panels.
Step 3. Service the Exterior or Outer RV Slide-Out Seal
With the slide open, you have full access to the rubber gasket where the RV exterior siding meets the slide-out. This gasket will go across the top, down both sides and across the bottom.
Expect to spend about 10-20 minutes per slide to service the outer seal.
To service this seal, you’ll want to give it a gentle wash with dish soap and water to remove any dirt.
Next, spray on your slide-out conditioner down the length of the gasket. Again, you don’t need to drench the seal; a light spray should be sufficient.
Want to Connect With a Community of Over 1,078 RV Enthusiasts?
Some brand instructions state there is no need to wipe the conditioner, but you must let it dry before closing the slide.
However, other brands say to take a rag and rub the conditioner into the seal to ensure all the rubber surface gets covered.
Once you clean one and condition one side of the slide, move to the other side and repeat the process. Let the conditioner dry a few minutes before using your sock of baby powder to coat the exterior gasket rubber, just as you did on the interior of the RV.
Trying to clean, condition, and powder the top of the exterior inner slide-out seal is challenging if your camper has a slide topper.
A topper is a short awning that extends from the roofline to the outer edge of the slide, helping to shade the top of the slide from the sun and protect it from rain.
From your ladder, you should be able to reach in with your arm a good distance from each side. To access the center, I suggest you try using a grabber pole with a rag to give you the additional reach you need.
Once clean and dry, it’s time to spray or rag on your conditioning product.
Finish the process by getting underneath the slide-out and treating the bottom gasket.
If you’re unsure about these steps, it may be helpful for you to watch this video on how to service RV slide-out seals and other components of the system.
Most RVers who have campers with slides also clean and lube the rails or tracks that move the slide-out at the same time they condition the seals.
While this task doesn’t need to be done as often as rubber seal servicing, look to schedule it twice a year to avoid rusting of the metal and squeaking or squealing when you operate your slide.
RV Slide-Out Maintenance (Video)
Step 4. Test the Action of the RV Slide-Out
To check for proper servicing, open and close the slide two or three times.
Listen for the tell-tale popping or cracking sounds that mean there is still an issue with the slider seals.
Hopefully, all you hear is the humming of the motor that controls the motion of the slide.
If you hear noise, first try to rectify the issue by running more baby powder over all the seals. If more powder doesn’t work, it’s time to have a professional inspect your RV to find the cause.
Step 5. Maintain the RV Slide-Out Seals
Once you have your RV slide-out running smoothly and quietly, you’ll want to keep it that way, so add this task to your RV care calendar at an interval that works for your climate and camping schedule.
If you ever feel that checking and servicing your slide-out gaskets isn’t worth the hassle, remember that replacing one seal will cost around $500. That hit to your wallet should be incentive enough to get the job done.
Final Thoughts
RV ownership isn’t all fun and adventure. Keeping your RV in top condition, including inspecting and servicing your slide-out seals, is crucial for protecting your investment so your camping trips aren’t sidelined by water or air leaks.
I trust that following the outlined steps will simplify the upkeep of your fifth-wheel, motorhome, or travel trailer’s slides, helping to prevent damage that could necessitate the replacement of your slider seals.
A little preventative maintenance can keep your RV slide-out seals in top shape for years, which means more travel and less stress!
RV How-To: Slide-Out Seal Conditioning (Video)


"Man cannot discover new oceans unless he has the courage to lose sight of the shore."
-- Andre Gide


