
Everyone knows RVs have poor insulation. For people who camp in colder climates, having an extra barrier on their camper underbelly can increase comfort dramatically and prevent freezing or cracking of plumbing lines.
The real issue with RV underbelly insulation is finding the right products and installing them correctly so you can still travel.
To help you create an effective barrier against cold, I put together this guide on how to insulate an RV underbelly to buffer your camper from harsh winter weather.
Don’t let winter camping cause damage to your RV or leave your floors too cold to walk on barefoot. Instead, use the guide below to add a layer of protection that will increase your camping enjoyment all year long!
Reasons to Insulate Your RV Underbelly
When you don’t insulate your RV underbelly, you can have the following issues:
- Burst plumbing lines from water freezing in the pipes
- Cracks and leaks from wastewater holding tanks
- Water coming from the water heater becomes cold before it reaches the shower or tap
- Valves and fittings loosening and dripping water
- You have a cold floor inside your camper
- It’s easier for rodents or insects to get inside the RV
- Higher expenses for propane or electricity for heating and cooling
- Corrosion of underflooring, wiring, and metal components from road salts and grime
Another aspect of good RV underbelly insulation is how it reduces noise while traveling.
RV Underbelly Insulation Products
Before selecting the right RV underbelly insulation product, you need to look at the type of undercarriage you have and decide if you want to DIY the work or hire it out.
The most common choices for insulating the underside of an RV are panels of dense foam insulation or spray foam insulation.
Which RV Underbelly Insulation Is Better, Spray Foam or Panels?
If your budget allows, spray foam insulation is the better option for sealing your RV undercarriage. It will grab tightly to the subflooring and framing and create a solid barrier with no cracks or gaps over the entire surface.
Spray foam is also better on motorhomes, as you won’t have to worry about panels popping loose over time and falling during travel days, causing problems for you or others on the roadways.
The biggest issue with spray foam insulation on an RV underbelly is that it doesn’t perform well under scorching conditions, which means if you live and camp in the blazing southwest, you should look into other options.
Another downfall of spray foam insulation is that you often cover pipes and fittings with the foam, making future access to those parts challenging.
Steps for Insulating Foam Panel RV Underbelly Installation
The supplies you need to apply foam panels to your RV undercarriage include:
- Panels with the R-value and thickness to fit the space
- Seam tape compatible with the insulation foam board of your choice
- Compatible adhesive or glue
- Pipe insulation tubes
- Metal/wood screws with washers – of various lengths depending on attachments points
Most hardware or home improvement stores will sell all the supplies you require to tackle your RV insulation project.
You will need a power drill driver, good lighting, and help from a friend to make the process easier.
Step 1. Measure RV Underframe for Size and Depth
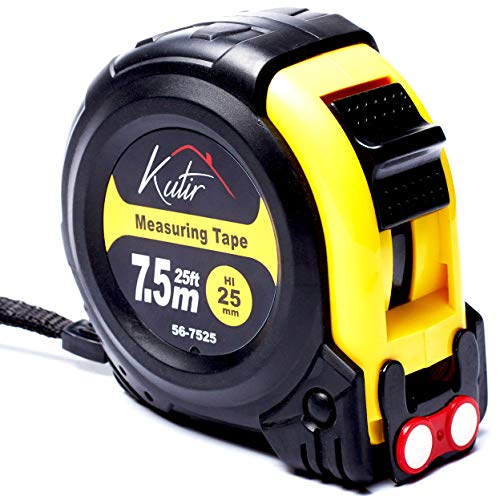
- ✔ 7 Feet Stand Out Made Measuring Easy: With a sturdy matte blade measuring 0.15mm thick stand out till 7 FEET, this 25 foot…
- ✔ Accidental Drop Protection With Shock-Absorbent Case: The casing of our retractable measuring tape is made out of a top grade…
- ✔ Working Alone Became Easier with Magnetic Hook: The end of the measuring tape is outfitted with a powerful magnet, allowing…
- ✔ Easy to Read Bold Numbers: Thanks to the measurement indicators on the measurement tape, Bold Easy To Read Large Numbers, our…
To buy the correct amount of supplies to complete insulation work, you’ll need to measure out the underbelly area.
On travel trailers, fifth wheels, pop-up campers, or teardrop campers, this job is much easier, as there are no engine and drivetrain components in your way.
Some RVs do have a thin plastic sheathing that closes off the underbelly that attaches with screws. You must remove this to access the underside of the camper floor and see the holding tanks, wiring, and plumbing lines.
Once you have a front-to-back and side-to-side size for how much square footage of foam insulation boards you need, you also need to measure the framing depth to see how much space you have to adhere to panels without interfering with other components.
You can buy panels in thicknesses from 1/2-inch up to 2-inch, but most stores stick to one-inch-thick or under panels.
The foam insulation panel R-value is key to getting the best results from your underbelly insulation. The higher the rating, the better to stop heat or cold penetration through the material.
Step 2. Disconnect Wires or Pipes from the Underside of the RV
Unplug your camper, disconnect the house battery, and empty any fluid from waste tanks before starting the insulation process.
Take a good look under the camper for any low-hanging piping or wires that interfere with the flat installation of foam panels to the underbelly.
Detach anything that you can, but first, take pictures or add tape with reattachment details onto the ends of loose parts so you can reattach them quickly when you get the foam panels in place.
If you feel you have room to slip the panels underneath the wiring or pipes, you can leave them alone and save a lot of time.
TIP: If you see gaps up inside the floor framing, you can choose to stuff in batt insulation before adding the panels to increase the effectiveness of your barrier.
Step 3. Cut and Attach Foam Insulation Panels to RV Underbelly

Expect this portion of the project to go slowly, and it will be easier if you have another set of hands to position and hold the panels in place as one person attaches the material with adhesive and screws.
Do not use nails to attach foam panels like you would in residential construction projects. Nails will wiggle loose over time from road vibrations and ruin all your hard work.
Once you cut a panel that fits into an open space between the RV floor framing, add the strongest adhesive you can find to the underside of the RV or the top of the foam board and push it into place.
Often, the glue alone will hold the panel until you can secure it, but you may need extra hands or a prop to keep it in place. Next, pop a wide washer onto your screw and attach it through the panel and into the subfloor or metal framing until snug.
Ensure screws are not so long they penetrate the flooring in the RV or hit other objects. The width of the foam panel plus 1/2 inch is typically sufficient for a good hold.
If you fear you may hit critical tanks, lines, or wiring with a screw, do use a liberal amount of adhesive instead and prop the panel in place until it dries. You can add metal banding straps across the boards when complete to stop them from falling loose over time.
Cover all the seams and gaps in the foam board with appropriate tape to stop any airflow penetration.
Step 4. Reattach and Protect Wires and Pipes

- Prevent heat loss or gain to save energy – For pipes that are 1/2 inch diameter.
- Use on hot or cold pipes, stop condensation on cold pipes
- Fire Retardant, Grey/Black Finish
- Easy to install with pre-cut slits that you can run your finger down to open
Using your notes and pictures, reattach any piping or wires you had to take loose during the installation of the panels.
After everything is back in place, you’ll want to cover any pipes or wires exposed to the elements.
Wrap and tape or zip tie plumbing and propane lines with high-quality RV pipe insulation.
Cover any bare wires with a pop-on sheath to protect them from corrosion from water, dirt, and salts. Take the time to use a few clips to secure them to the underbelly so they aren’t swinging around where they could get caught on tall grass or sticks at campsites.
Take a look at the large drain pipes coming from your waste tanks. Most waste drains are made of a freeze-resistant ABS material, but it can’t hurt to wrap them up with thinner sheet insulation if you plan to camp in icy conditions.
Step 5. Reinstall the RV Undercarriage Cover If Necessary
If you had to take off a covering over your RV underbelly to add insulation, now is the time to reinstall it.
How to Apply Spray Foam Insulation on RV Underbelly
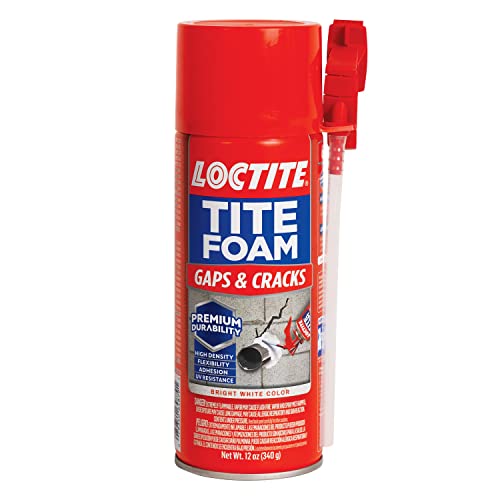
- Expands To Fill: Loctite Tite Foam Gaps & Cracks fills, seals, and insulates effectively around gaps and cracks up to 1 inch in…
- Premium Durability: Polymer foam based on purified and concentrated ingredients withstands harsh UV rays for long-lasting results
- High Density Foam: Offers high density with a uniform cell structure for durability and overall insulation for your remodeling…
- Superior Flexibility: Withstands building and material movement without compromising its seal
- Strong Adhesion: Sealant bonds to most building materials like wood, concrete, brick, stone, metal, pvc, and more
Spray foam is a great choice for temperate or cold regions, even those with high humidity, but it isn’t as effective in areas of high heat.
The benefits of spray foam for camper undercarriage insulation are so high that many RV repair centers and dealers offer this service to customers.
You can also find local home remodeling companies with the equipment to spray foam insulate your RV underbelly. Still, you may want to use them strictly for travel trailer applications, as motorhomes are trickier.
Prices will vary depending on experience and insulation type. For example, open-cell spray foam insulation costs less but isn’t as good as closed-cell spray foam insulation for RV applications.
What makes closed-cell better is that it’s waterproof, creating a better seal across the RV underbelly. Rodents don’t like it; it’s fire-retardant, and it won’t break down and fall apart after several years like open-cell spray foam insulation.
You can purchase DIY spray foam kits that cover the average-size camper undercarriage. Still, without experience using the product when applying it upside down, you may find it way more work than you’re ready to take on.
Want to Connect With a Community of Over 1,078 RV Enthusiasts?
You will follow most of the steps above to prep your RV for underbelly insulation and apply the spray foam once any cover, wires, or plumbing lines are clear. You’ll also need to add pipe insulation and protect wiring after the foam cures if necessary.
Tips to Apply Spray Foam Insulation On RV Underbelly
Tip #1: Don’t Cover Everything With Foam
When applying spray foam yourself, the biggest tip is to ensure you never spray over important features on your camper, especially if you have a motorhome.
Brake lines, turning parts, pipe fittings, or drain lines need to remain clear so they can operate freely, or you can access them later.
Spray foam takes several hours up to a couple of days to expand and firm up fully, so even if you think you kept enough space around critical RV components, you may come back and have a new problem on your hands.
Most people build small wood covers over anything they don’t want the foam to touch and remove after the foam cures. The wood can withstand the pressure of the expanding foam, unlike cardboard.
For RV parts like pipe fittings, you may need access to in the future, you can build U-shaped boxes out of foam board insulation and screw them into place. You can drop the bottom cover to reach parts as necessary.
Tip #2: Don’t Rush the Application
Start by covering a three or four-square-foot area as evenly as possible and let it expand and dry to see how it looks when complete.
A thinner swath of spray over a wider area is better than a thick swath over a smaller space.
Doing a small area prevents you from adding too much product, avoids drips, and gives you more control over where it goes, so it looks cleaner and forms a more solid seal.
If you did get foam on items you wanted to keep clear, let it partially puff up and gently scrape it off. If you try to remove the spray foam while in a more liquid state, it is very sticky and will only smear around, creating a big mess.
Alternative Methods to Insulate Your RV Underbelly

- Closed Cell Foam: OIL and Waterproof Liner closed-cell polyethylene foam is the best for car, Siless with an adhesive layer 100%…
- Heat Blocker and Sound Deadener: Effectively blocks 98% of radiant heat transfer. Siless Liner is a very versatile insulation…
- Lightweight, Waterproof: It is a waterproof light-weight thermal deadener with highly compressible closed cell foam formulation,…
- The operating temperature of the material is the same as of the rubber foam up to 215 degrees Fahrenheit.
- SILESS Liner specifications: Self-adhesive foam rolls (closed cell PE foam) with waterproof glue. Thickness 157 mil / 0.157 inches…
Another option for adding insulation value to your RV underbelly is to skirt your camper with thick fabric or solid wood, sheet metal, or vinyl material.
You’ll have to customize each panel to fit the RV depth around the perimeter, as some areas may have a taller gap from the ground to the siding.
I’ve seen fabric panels that snap to the exterior bottom edge of the RV siding while solid panels fit up underneath the siding edge and screw into place.
These panels are removable, but you’ll need to have room to store them in your RV during travel days.
If you have a stationary camper, you can leave the paneling in place and add foam board panels to the inside for more insulating value. You can then use the underside of your camper as protected storage for bulky camping supplies or sports equipment during the off-season.
Skirting of any sort provides a buffer to icy winds and deters larger animals from getting under your RV. You can use a material that matches your RV’s exterior to make it look seamless.
The thicker the material, the better it will hold heat inside, so you can enjoy most of the same protection against freezing as you would with direct-RV insulation application.
Final Thoughts
The warmer you can keep your RV underbelly during winter, the fewer problems you’ll have with cold feet, high electric or propane heating bills, and repairs to broken plumbing lines or wastewater tanks.
I hope you consider using some of the products and techniques above to reap the benefits of insulating your camper underbelly.
The best part is the investment in extra RV undercarriage insulation, which reduces road noise levels during travel and deters pest infestations during every camping season!
"Man cannot discover new oceans unless he has the courage to lose sight of the shore."
-- Andre Gide


")
