")
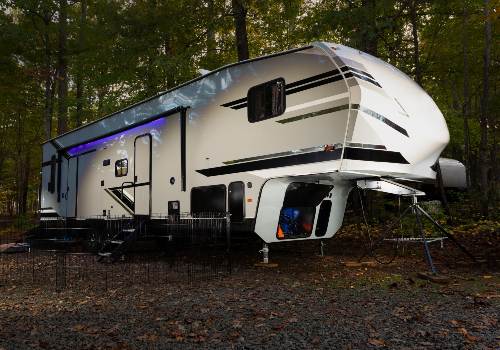
RV campsites are rarely level, which means wasting time moving your travel trailer or fifth wheel back and forth onto blocks trying to straighten it out so you can camp in comfort.
Luckily, there is a method to level a camping trailer fast and accurately so you can avoid the stress, and I put all the details right here.
To teach you how to level your travel trailer or fifth wheel every time, often on the first try, follow the tips in this guide. By the end, you’ll have the skills to level your camping trailer like a pro and impress your campground neighbors!
Why You Want a Level Travel Trailer or Fifth Wheel
When your camping trailer is out of level, living inside can feel awkward and can often be dangerous, which I explain below.
Objects and People Can Slip and Slide
Having a heavy can of food roll off the countertop and onto your foot hurts, and trying to sleep or walk if the RV is slanted even a couple of inches out of level is difficult.
Opening a cabinet, especially that overhead, and having items fall out can cause injury.
A trailer tilting even a few inches to one side makes walking unsteady, causing you to bump into the furniture.
Trailer Components Won’t Work Properly

Operation of your trailer’s windows, doors, slideouts, and appliances may also have issues if your trailer is too far out of level.
Doors, windows, and slideouts all use tracks and other mechanisms to open and tightly shut the units. However, if the camper is off-level, it puts undue pressure on one side of the trailer, slightly warping walls, tracks, and parts so things don’t slide smoothly or shut completely.
Some recreational vehicle appliances can break down if you run them more than a few degrees out of level, which leads to expensive repairs or replacements.
Most refrigerators in a fifth-wheel or travel trailer run on propane and electricity. This type of RV fridge is the most vulnerable to damage from your camper being out of level because it relies on gravity to move the ammonia inside the coils.
When the trailer is out of level, the ammonia pools to one side and can quickly cause overheating of the coils and damage the appliance
Trailer Plumbing May Not Drain Correctly
The plumbing inside any RV relies on gravity to drain wastewater into the holding tanks and out of the tanks into the city sewer system.
When your camping trailer is out of level, it could cause wastewater to pool up in the drainpipe and lead to possible clogs and odors.
A tilting camper can also cause RV waste tank sensors to give false readings.
What You Need to Level a Travel Trailer
All RVs without an automatic leveling system should carry a leveling kit with these items:
- Leveling blocks or ramps
- Wheel chocks
- Small levels
- Stabilizing jacks
- Jack pads
Leveling Blocks or Ramps and Chocks
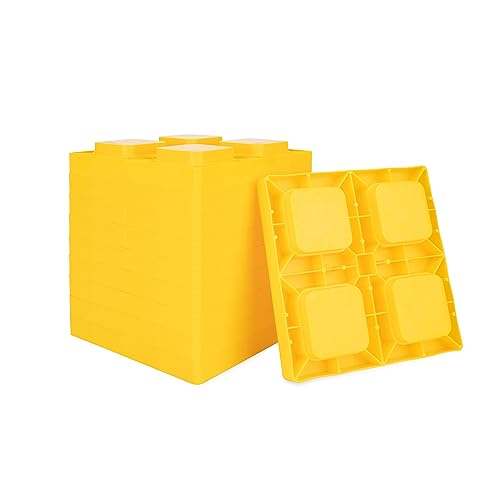
- CUSTOMIZABLE RV LEVELING SYSTEM: These interlocking RV wheel blocks offer a reliable way to achieve safe and secure camper…
- COMPATIBILITY: Camco’s leveling blocks work with single wheels, double wheels, hydraulic jacks, tongue jacks, stabilizer jacks,…
- SIZE & CONSTRUCTION: These durable resin blocks each measure 8 ½″ x 8 ½″ x 1 ½″. (10) leveling blocks are provided.
- SIMPLE TO CARRY & STORE: The Camco camper leveling blocks are easy to carry and store in the included zippered storage bag with…
- AMERICAN MADE: This RV must-have is proudly made in the USA.
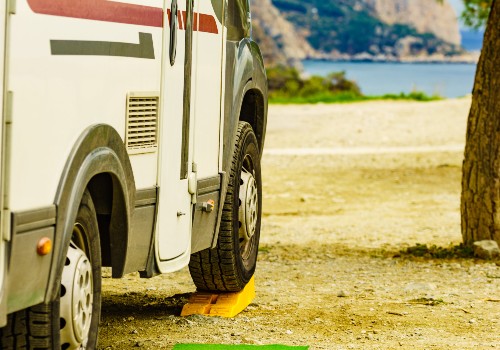
Depending on the size of a fifth wheel or travel trailer, most owners rely on cuts of 2×10 wood planks or a set of plastic leveling blocks to prop up the tires on the low side of the camper to make it level.
Wood can get dirty and is heavier to carry in the RV. Also, if you need to stack another board, wood easily slides about when rolling the trailer tires on top.
Plastic blocks made for RV leveling are extremely durable yet lightweight. Most snap together into any configuration you need so they don’t move during leveling, and all are easy to wash and dry to keep them clean during storage.
Another top choice for leveling a trailer with a single or double axle is the leveling ramp and chock kit. The kit comes with a rubber mat that helps protect the ramp from slipping and helps create a flatter surface underneath so it sits evenly.
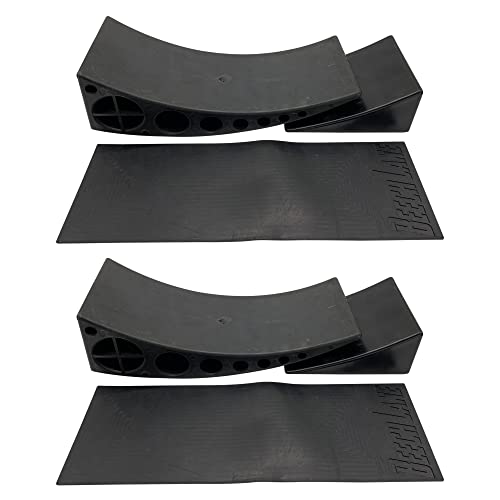
- Patent D949746- Includes Two Levelers, Two Chocks, And Two Grip Mats (Does Not Include A Bag) – Precise, Frustration Free Leveling…
- Patented Ultra Strong Levelers Are Built With Highest Quality Nylon Polymer Construction To Last A Lifetime – Unlike other camper…
- Included Rubber Grip Mats To Help Prevent Leveler From Sliding When Backing On – Beech Lane has developed custom rubber grip mats…
- Two Levelers Can Be Used For Dual Axle Trailers, But Up To 4″ May Need To Be Cut Off The End Of One Leveler Depending On How Much…
- Manufacturer Lifetime Warranty – Beech Lane stands by its product with a lifetime warranty on the levelers and chocks.
This type of trailer leveler makes it much easier to roll the tire, as the lower edge is flat to the ground. Then, moving the trailer tire further onto the curved plastic ramp raises the tire to the height you need to level the trailer side to side.
When you are happy with the degree of level, you insert the chock, and the whole unit is secure.
For extra security on dual-axle trailers, you can insert and deploy wheel stabilizer jacks on both sides of the camper. These jacks do a great job immobilizing the tires and are a good idea when the terrain at a campsite is extremely off-level.
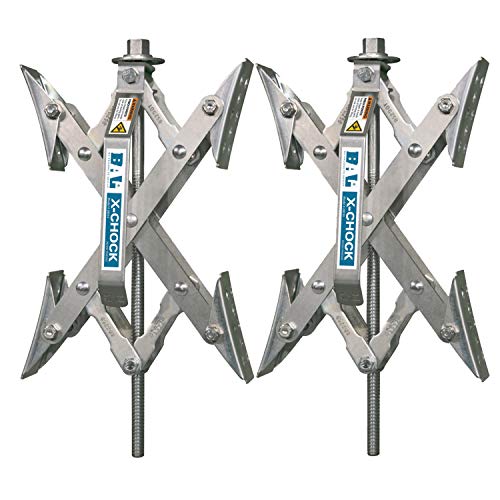
- Provides added stabilization and prevents tire shifts by applying opposing force to tandem tire applications
- As opposed to other chocks, the X-Chock works with the tires’ natural movement instead of against them
- Fits even the tightest of applications retracting down to 1 3/8” and extends to 10”
- Rust inhibitive coating.
- Plated ratchet wrench with comfort bumper included
The last choice for lighter-weight, single-axle travel trailers is using a BAL leveler that doesn’t require you to move the camper back and forth onto blocks.
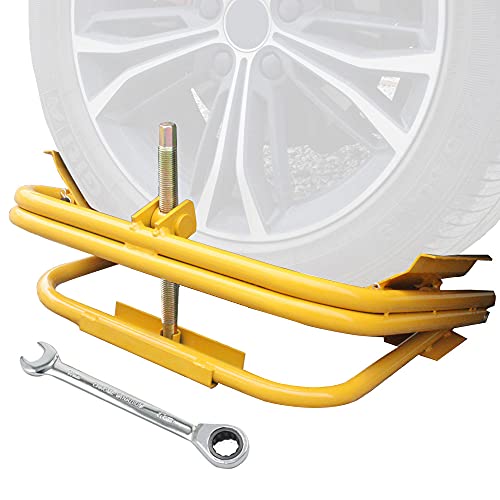
- Easy Leveling: BESTOOL RV wheel levelers allows easy leveling without blocks or ramps, Light trailer tire Leveler can be used with…
- Raises Trailer Axle: RV Leveling Kit have solid construction,maximum Bearing up to 3000 lbs,raises an axle up to 8-inches when…
- Adaptation Specifications : Fits most 13 inch, 14 inch and 15 inch wheels with up to a 28 inch tire diameter
- Compatibility: RV levelers designed for light, single axle trailers only, can be used to turn the drive screw, elevating or…
- Features: Adjustable baffle allow the RV tire trailer leveling to more accurately fit the tire and provide…
The tire leveler slips around the low-side tire and lifts it within a stable frame. The unit is pricey, but the ease of use makes it a great value and is the fastest way to level your travel trailer perfectly on the first try.
The last item you’ll need is standard wheel chocks to place behind all of the trailer tires to prevent rolling as people move in and out of the camper.
Small Bubble Levels
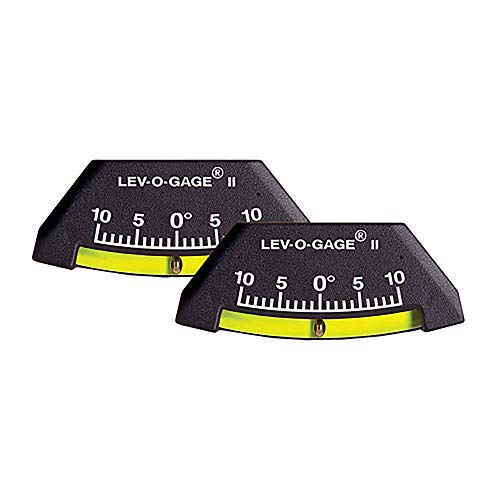
- Ideal Tilt Reading – Each gauge monitors tilt from -10 to 10 degrees. Brass ball rides in special damping fluid for smooth,…
- Easy to Read Display – Brass ball indicators in bright Saturn yellow tube assembly provide higher visibility than traditional…
- Shatterproof Design – Slope indicator tube assembly is made out of a rugged copolymer “flex tube” for ultimate durability. Can be…
- Mounts With 3M VHB Tape – The levels includes a piece of 3M VHB (Very-High Bond) adhesive tape on the back for easy stick on…
- Made in USA – From durable, high-quality materials. Lev-o-gage slope indicators are built to last. One of the must-have…
Adding small bubble levels to your travel trailer or fifth wheel exterior sides and rear makes it much faster to straighten out the camper.
By having three permanently installed near the bottom edge of the trim in the center of the trailer sides and rear, anyone helping park the trailer can quickly see which side is low and when it is level.
The rear level is for side-to-side leveling when using blocks, while the side levels are for front-to-back leveling that you adjust with the main jack stand.
Before attaching levels to your trailer, you must first ensure the camper is straight in both directions. You can use a long carpenter’s level at the bumper and bottom edge of the trailer sides to check for accuracy, then glue or screw on the RV levels with the bubble dead center.
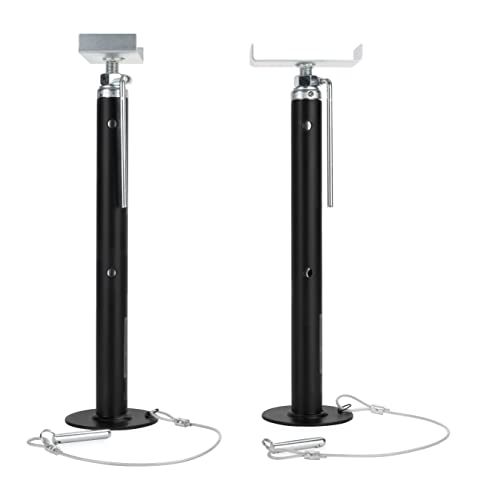
RV Stabilizing Jacks
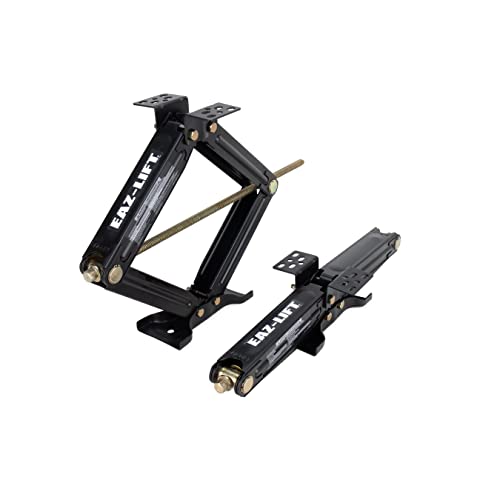
- Effortlessly Stabilizes RVs: Scissor jacks have a certified 7500 lb. load capacity
- Easy to Install: Allows either bolt-on or weld-on installation
- Adjustable Height: Can be adjusted from 4 3/8-inches to 23 ¾-inches high
- Includes: (2) scissor jacks and (1) scissor jack socket for power drill
- Stabilizes a Variety of Vehicles: Designed to stabilize pop-ups, trailers and other large vehicles; Durable Construction: Made of…
Stabilizing jacks are not suitable to level a travel trailer or fifth wheel but only to provide extra support points underneath the framing to decrease movement or rocking after your trailer is level.
TIP: Manually running stabilizing jacks up and down is tiresome, so carry a power drill with the appropriate bit (many jack kits come with an adapter for this purpose) to make this task effortless.
Jack Pads

- Helps prevent RV jacks from sinking into the ground; Not intended for use with hydraulic jacks
- Interlocking design and handy storage strap for easy storage
- Made of heavy-duty, UV stabilized polypropylene; Includes a built-in handle for ease of use
- Features 6 1/2-inches x 6 1/2-inches of usable pad
- Set of (4); Made in the USA
Jack pads are durable blocks with handles made to slip underneath manual and power RV leveling jacks or stabilizer jacks to stop the jacks from sinking into soft ground when they are taking on the camper’s weight.
How to Quickly Level an RV Towable Trailer With an Automatic Leveling System
Even if you own a travel trailer or fifth wheel with an automatic hydraulic leveling system, you still need to prepare the area where the bottoms of the jacks will sit.
Start by positioning your trailer in the campsite to your liking.
Next, partially lower the leveling jacks by pushing the power button for a couple of seconds.
Get out your jack pads, set one underneath each jack, and finish lowering the units until the control panel indicates level. By partially lowering the jacks, it’s much easier to see exactly where you need to place the pads so the entire foot rests on top.
If your jacks do not extend enough to level your trailer, you’ll need to raise them again, slip leveling blocks or wood planks under the low areas, place the jack pad on top, and try again.
Don’t skip the jack pads when you are on a paved parking slip because jacks can scratch cement surfaces and sink into warm asphalt.
How to Manually Level Your Travel Trailer or Fifth Wheel Quickly
Leveling any travel trailer or fifth wheel requires you to check and adjust the side-to-side and front-to-back planes until they are even.
The front-to-back axis is a simple task, as you only need to use the trailer jack by the hitch to achieve a level, while the side-to-side axis requires lifting the tire or tires on the low side of the campsite.
For the fastest way to get your camping trailer level on the first try, follow these steps:
Step 1. Position the Trailer on the Campsite, but Do Not Unhitch
Park the trailer in the campsite as close to where you want it, making sure it’s in alignment with the patio area.
Don’t unhitch the trailer from the truck or tow vehicle UNLESS you are using a tire leveler that does not require leveling blocks or ramps and you are happy with the trailer location.
Step 2. Eyeball the Terrain and Prepare the Leveling Units
Before you begin placing blocks under the low tires of the trailer, you must first assess the situation by the driver or a helper taking a quick walk around the camper.
Check out the back bubble level and see which side of the trailer needs lifting. Most RVers find it perfectly safe and comfortable to leave the camper where it is if the bubble is no more than halfway off the centerline of the level.
Often, you can slowly move the trailer back and forth a few feet (if there is room) and find a sweet spot that is level or very close.
Once you are happy with the travel trailer locations, try to gauge how high the tire needs to be so that you can put the appropriate number of blocks underneath.
TIP: Note where the bubble is inside the level before starting and how many blocks were necessary to straighten up the trailer. In the future, it will be even faster to level the trailer once you memorize the number of blocks it takes in relation to how many degrees off-center the bubble is.
If you are using standard leveling blocks, decide which forward or backward direction you want to move the trailer to get the tire or tires on top.
Want to Connect With a Community of Over 1,078 RV Enthusiasts?
It’s much easier to roll tires onto a sloping block, so snap together the blocks into a ramp-type shape if possible to gradually raise the tire into position.
Step 3. Position the Tire Leveler, Leveling Blocks, or Leveling Ramp
If you have a tire leveling unit, slip it around the low tire and crank the shaft to raise the tire in increments until you see the back bubble level is centered.
For everyone else, you need to position the ramp or blocks in front of or behind the tire or tires, depending on which way you plan to move the trailer with your tow vehicle.
You will place the ramps behind the tires when pushing the trailer backward and in front of them if you find it easier to pull the camper forward.
However, before you place the leveler system of choice, move the camper a foot or so forward or back to give you room to put the blocks or ramp on the ground in the original place the tires were sitting.
You want to align the levelers directly in line with the tires so the entire tread sits on top.
Step 4. Move the Trailer Onto the Leveling Blocks or Ramp
While many RV pros can level their trailer without help, having a spotter is extremely helpful in expediting the task.
A spotter can watch the tires as they roll onto the blocks and tell you when to stop, then check the rear bubble level to see if it’s at or very close to the center.
If you do need to adjust the block height, the spotter can quickly make the adjustment by adding or removing blocks after the driver rolls the trailer back off the blocks, so you can immediately try again.
TIP: To avoid causing disruption at a campground by yelling out instructions to the driver while trying to level your travel trailer or fifth wheel, use your cell phones to communicate. If the driver places their phone on speaker, they can clearly hear the engine noise yet keep both hands on the wheel.
Step 5. Chock the Wheels and Proceed to Unhitch
When you are happy with the side-to-side level of the trailer, you need to chock the wheels on both sides of the camper so they don’t budge when you unhitch from the tow vehicle.
After chocking the RV tires, unhitch and move your tow vehicle out of the way. DO NOT open slideouts.
Step 6. Level the Trailer Front-to-Back
The last step in leveling a travel trailer is to straighten out the front-to-back axis by adjusting the height of the hitch until the side bubble level shows center.
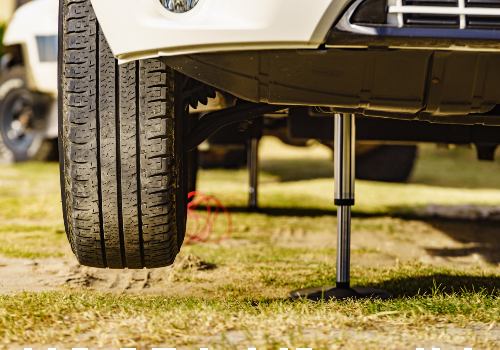
A fifth wheel has a landing jack stabilizer, and a travel trailer will have an A-frame jack you want to place on a jack pad or wood block for stability.
There are manual and power RV leveling jacks, so adjust the unit accordingly. Some power jacks have an extra feature that will indicate when the trailer is level, so you don’t have to walk to the side and check the bubble level if you are parking alone.
Automatic-leveling power jacks for trailers are another trick to parking your trailer and getting it level fast. Many fifth wheels have automatic leveler legs at the front of the trailer under the main box that you will adjust before adding in and tightening the landing jack that fits under the trailer overhang.
TIP: For fifth wheels or travel trailers with middle or rear wastewater tanks, the plumbing lines drain will drain better if you leave the front end of the trailer slightly higher than the back. You shouldn’t notice that little bit of difference when moving about inside the RV.
Step 7. Set Up the Travel Trailer Stabilizers
- PROTECTS SLIDE-OUT MECHANISM: These supports provide added stability for extended slide-outs. Keep your slide-out level and stop…
- ADJUSTABLE HEIGHT: Easily adjust from 19″ (collapsed) to 47″ (extended), with incremental locked positions. The tethered pin…
- COMPATIBILITY: These camper slide-out supports are designed to fit up to a 5 ½″ slide-out rail.
- CONSTRUCTION & MAXIMUM RATED LOAD: Constructed of durable steel, the Eaz-Lift Slide-Out Supports can hold up to 5,000 lb.
- INCLUDES: This item comes with (2) slide-out supports to keep your RV in top shape.
Lower permanent stabilizer jacks or place portable RV stabilizer jacks into position.
Crank them, so there is even pressure on all of them. Please remember that you are not trying to lift the trailer, only prevent swaying.
Once the stabilizers are in place, you can open any slideouts if you have them and set up the slide-out supports. Use jack pads underneath any stabilizers or supports for more security.
Final Thoughts
A level travel trailer or fifth wheel will make campsite living safer and more comfortable.
Using the tricks in this guide will allow you to quickly level up your camper when you don’t have the luxury of automatic leveling jacks.
With practice, you’ll soon master how to level a camping trailer the first time, every time, in only ten to fifteen minutes. Not only will mastering this method help you gain confidence in your RVing skills, but it will also give you more time to finish setting up camp and start relaxing.
How to Level Your RV Fast and Accurately (Video)

")


"Man cannot discover new oceans unless he has the courage to lose sight of the shore."
-- Andre Gide


")
