
What’s the solution to avoiding propane reliance to run your RV’s water heater?
The answer is to convert the unit to run on electricity as well as propane.
What you may find very surprising is that converting your RV propane water heater to electric is an affordable, reliable, and straightforward DIY project.
That’s why I explain down below the benefits of installing an RV water heater conversion kit, what products are best, and the steps to add one to your camper.
You may want to give it a try, so check out the details below.
What Is an RV Water Heater Electric Conversion Kit
Going electric with your water heater in your travel trailer, fifth wheel, or motorhome doesn’t mean you need to replace your propane water heater with an expensive electric-only version.
The best way to run your camper water heater on electricity is to install an affordable RV water heater conversion kit. The kit consists of:
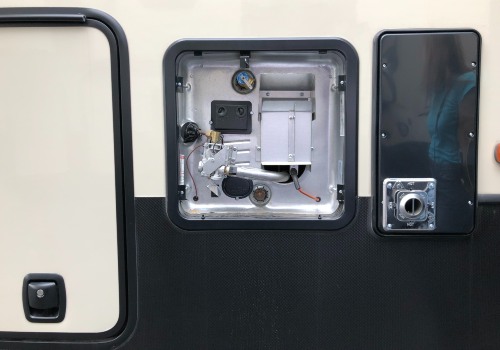
The RV propane-to-electric water heater kit uses a special rod attachment you screw into your RV’s water heater tank via the drain plug.
The rod has wiring that runs to a thermostat you attach to the side of the tank, which then plugs into a standard RV 110-volt outlet.
Once you plug into shore power at a campsite or other location, the unit automatically kicks in to heat the rod and, therefore, the water in the tank.
With such few components, installing a conversion kit is pretty quick and, for most people, an easy DIY project.
How do I know? I went propane-free in my motorhome years ago by installing this product.
I thought for the simplistic design and low cost, the kit wouldn’t work well for long. But, to my amazement, it’s still going strong after over eight years of full-time use!
Do be aware that many newer RV water-heating systems have dual propane and electric options and won’t need a conversion kit.
The Benefits of Converting a Propane RV Water Heater to Electric
If you’re unsure about installing a kit to convert your RV propane water heater to electric, check out these benefits.
1. Reducing Propane Use and Cost
The most significant benefit to converting your RV’s propane water heater to electric is to reduce camping costs by lowering propane consumption.
RV campsites nearly always include the cost of electricity in their daily or weekly rates. Not having to pay extra to run electrical appliances means you can save money when heating your water for showers or washing dishes versus paying for propane fills.
Most RV parks do charge per kilowatt-hour for electricity if you stay for a month or longer. Depending on the cost of propane and the efficiency of your RV appliances, it’s often cheaper to operate on electricity.
For full-time or long-term RVers who want the most flexibility to save money while camping, it’s best to keep your propane system active along with using a water heater electric conversion kit.
2. Easily Maintain Hot Water if Propane Runs Out
Another benefit of installing a conversion kit is for a backup when you run out of propane and can’t get a refill quickly.
You can swap over to electric by plugging in your water heater conversion system or use a generator for power if off-grid and still have the luxury of hot water.
3. Heat RV Water Faster
You can use the electric heating element along with your propane system to heat your RV water tank super fast.
This benefit is ideal when several people need to shower in a short time frame, and you can’t wait an hour or so for your tank to reheat between uses.
4. Save On RV Space and Reduce Weight
If you camp strictly at campgrounds that offer electric hookups, you can forgo the propane system and save space and weight by removing the bulky tanks from your RV.
The Best RV Water Heater Conversion Kits
Here are the top two propane water heater to electric conversion kits on the market. Both get high ratings from customers and are reliable products.
Valterra Hott Rod Water Heater Conversion Kit
The Valterra conversion kit for 6-gallon RV water heaters (Amazon link) is not too expensive, but you can get it even cheaper because it’s often on sale. Hott Rod also offers a kit for 10-gallon water heater tanks.
The Hott Rod units provide a safe way to heat water quickly. You can adjust the thermostat to heat water from 90° to 150°F.
You don’t need to dismantle your propane system, so it’s still available for off-grid camping or when you want to boost heating times by 25% by using it in tandem with propane.
I put this model in my RV and find the performance very impressive.
Once a year, I remove the anode and clear away any build-up on the rod, which is always very little. You can purchase replacement anode/heating rods if necessary.
When my original water heater finally rusted out two years ago, I removed the Hott Rod kit and reinstalled it on my new water heater with no problems.
Camco Hybrid Heat Water Heater Conversion Kit
The Camco Hybrid Heat conversion kit (Amazon link) is another top-selling system. Camco sells a similar kit for a 10-gallon RV water heater size.
The only real difference between the Hybrid kit and the Hott Rod is that it provides an on/off switch to control the unit without plugging and unplugging the cord.
The Hybrid Heat kit has a stainless steel heating rod and a thermostat to adjust to heat water between 90° to 150°F.
Wires are color-coded, and instructions are easy to follow.
How to Install an RV Water Heater Conversion Kit
RV Water Heater Conversion Kit Install (Video)
Installing a conversion kit will be very similar to the Hott Rod or Hybrid Heat models.
Follow the following 8 steps to ensure proper installation and gather these supplies:
- Teflon pipe tape
- Adjustable wrenches or socket set
- Bucket and rag
- Drill and metal bit
- Screwdriver
- Razor Knife
Step 1: Locate the Nearest 110-Volt Outlet to the Water Heater
Before you add components to the water heater, take a few minutes to search out the nearest outlet to your water tank.
The cord to plug in the heating system is only about six feet long. If you don’t have an outlet close enough, you’ll have to install one as you don’t want to use an extension cord to plug in the unit.
If you’re retrofitting an extra outlet into your camper, it may not be a simple task to run wiring. If you’re uncomfortable doing it yourself, hire an electrician.
If you already have an outlet nearby, you’re in luck! The installation of your conversion kit will move swiftly, often within an hour or so.
Step 2: Turn Off RV Water and Propane and Drain the Water Heater Tank
Unhook the water from your RV and make sure the water pump and propane are off.
Let any water inside the hot water tank cool down before draining.
Open the access door to your water heater and remove the drain plug near the bottom of the tank. You’ll need large pliers or a socket to unscrew the plug.
Often, the drain plug is in a difficult-to-remove location behind parts of the propane system.
You can use wrenches to unscrew the propane feed line, remove the screws for the piping and heat shield, and remove them without harm. Please take a picture first to ensure you know how to reattach it correctly later.
If you plan to remove your entire propane system from your camper, you don’t need to reinstall these parts.
Once you have the drain plug off, you can quicken the emptying of the water by opening the pressure relief valve near the upper portion of the tank.
The tank can hold up to six or ten gallons of water, so if you don’t want a puddle near your work zone, have a bucket or two handy to catch it and a rag to wipe up the rest.
Step 3: Drill a Hole in the Tank Housing
You now need to drill a 1/2-inch hole in your water tank housing about halfway up on the left-hand side. The hole is to run the wiring from the heating element to the inside of the RV for the thermostat.
You’ll need a metal drill bit to cut cleanly through the housing. The instructions with your kit should indicate the best positioning and size for the hole.
Step 4: Install the Heating Element
Pull out the heating element from the packaging and wrap Teflon pipe tape around the threads at the end of the rod.
Want to Connect With a Community of Over 1,078 RV Enthusiasts?
You may need an adapter fitting for some RV models to transition the drain hole size to fit the heating element threads. Typically, the adapter comes per brand, say for a Suburban or Atwood RV water heater.
You should also find the correct size brass adapter at a hardware store if it doesn’t come with the kit.
If you need to insert the adapter, wrap pipe tape around the threads before screwing it in, then slip the long end of the rod into the drain opening and screw in the heating element. Ensure all components fit snugly but do not over-tighten.
The heating rod works like the original plug to prevent the tank from draining.
Step 5: Attach Wiring to the Heating Element and Feed Into the RV
The end of the heating element has two prongs that slip into one end of the wiring connector.
You can attach the plug end to the heating element in the position that best keeps the cord away from the propane piping, so take a moment to ensure it’s in a good direction.
You can now add the rubber gasket to the inside edges of your hole if your kit comes with one. If not, carefully feed the cord with the three loose color-coded wires through the hole and into the RV.
You may need to stagger the placement of the smaller ends to fit through the hole.
Be careful not to cut the wiring on sharp edges as you pass it through the hole. Once the wire is inside, attach the cover over the wire at the hole location to prevent future damage.
Step 6: Install the Thermostat on the Water Tank
Access your hot water tank inside your RV and remove the metal cover if necessary.
Older water tanks may have a thick cardboard cover, while others may have styrofoam.
Once the cover’s open, you’ll need to remove the insulation to reach the metal surface of the tank. You’ll need to clear a space a bit bigger than the thermostat about halfway up the tank, but check the directions for exact placement.
The thermostat attaches with sticky tape to the tank after you clean the surface. Position the thermostat so you can read and adjust the temperature settings.
Follow the instructions to attach the color-coded wires you fished through the hole to the other wire harness in the kit. Connect the blue and red wire tabs to the appropriate connectors on the thermostat, then snap on the plastic cover plate.
Don’t plug the cord into an outlet just yet. If your conversion kit has an on-and-off switch, keep it in the off position.
Step 7: Reattach the Propane Fittings and Fill the Water Tank
Go back outside and put any propane parts back together onto your water tank if you took them off. Make sure you reattach the gas line and snug up the fitting.
Turn the propane back on and check for leaks.
Shut the pressure relief valve on the water tank.
Turn the water back on to your RV and let the hot water tank refill. You’ll need to open the hot water side of your kitchen or bathroom faucet while filling to allow the tank to form a proper air gap.
Step 8 Turn the RV Power on and Plug in the Thermostat
Lastly, plug your RV back into shore power and plug in the cord from the thermostat to the outlet. Flip the switch to the “on” position if you have one.
Let the water heat up and test the temperature. If the water is too hot or too cold, adjust the setting on the thermostat.
If you’re a little confused, you can watch this tutorial video on how to install the Hott Rod kit to understand the process better.
Final Thoughts
Once you add an electric option to your RV’s water heater, you can use only electricity to heat water or pop on the propane when necessary for extra heating power or off-grid camping.
Hot water is such a blessing after a long day enjoying the local sites. Ensure you’ll always have a supply available by installing a propane-to-electric water heater conversion kit in your RV.
Hot Rod RV Water Heater From Propane to Electric or Both (Video)


"Man cannot discover new oceans unless he has the courage to lose sight of the shore."
-- Andre Gide


")
